Free standard shipping for orders over $250.

Lemon Cherry Cookies Auto

Lemon Cherry Cookies RF3 : Germination Phase

For the Lemon Cherry Cookies RF3 run, we germinate 200 seeds to eventually select the top 50-100 standout phenotypes that will define this generation’s expression.
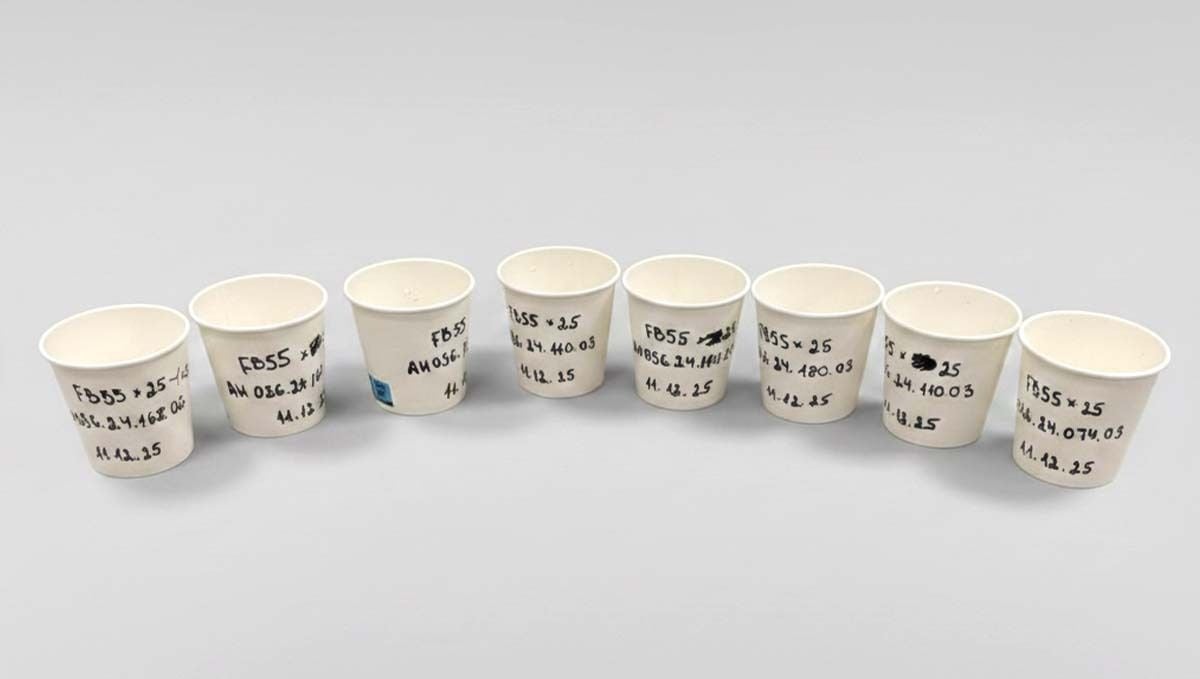
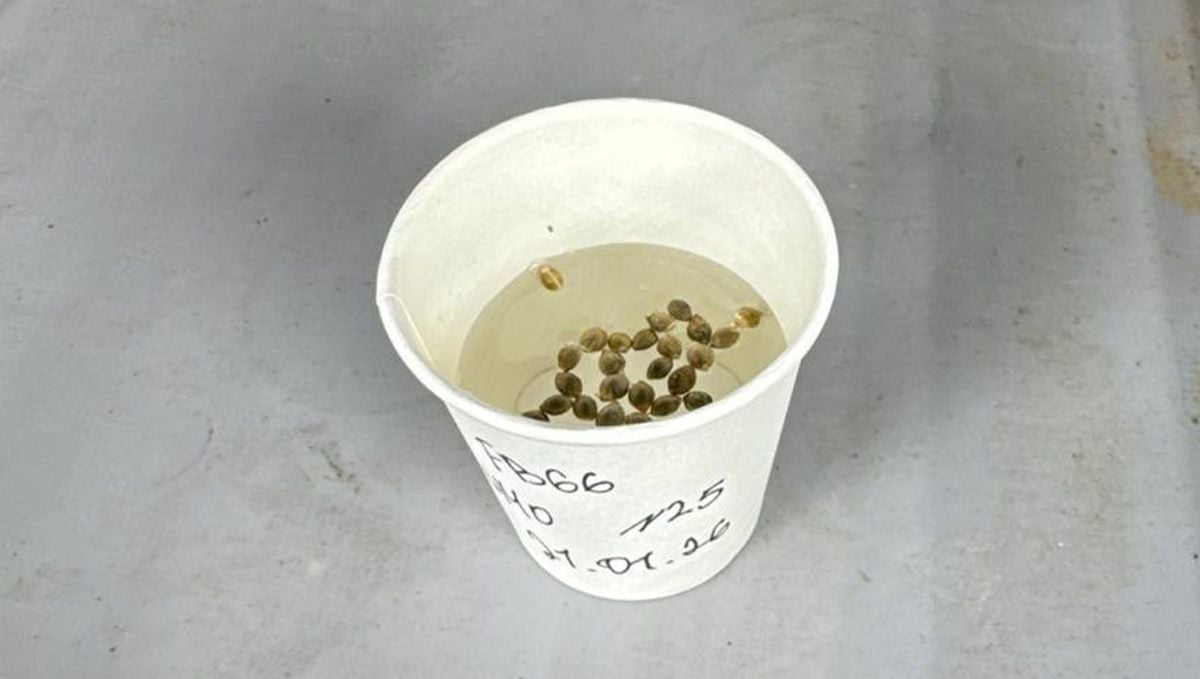
Soaking seeds LCC

Soaking seeds Lemon Cherry Cookies


The germination process follows the simplest and most reliable method soaking seeds in water. We use tap water adjusted to 0.6 EC, balancing the pH between 5.9 and 6.2. Proper water chemistry ensures that the seeds hydrate evenly and roots develop with stable vigor. Always use room-temperature water never cold or hot as temperature shock can drastically slow down germination or deform early root growth.

Each batch goes into standard disposable cups, no more than 25 seeds per cup. Over multiple runs, we’ve learned that this setup consistently produces straighter, more uniform roots, making the transplantation into Sabika Peat faster and cleaner.

When working at scale, small optimizations like this multiply into massive efficiency gains.Always place your cups in a dark, warm space with stable room temperature. Avoid cold surfaces like concrete floors – they can quickly pull heat from the water, leading to delayed or uneven germination.

After roughly 36 hours, you’ll notice healthy roots reaching 0.5 – 1 cm in length a perfect signal to move into the next stage of our cycle.

Planting in Sabika Peat : From Shell to First True Light

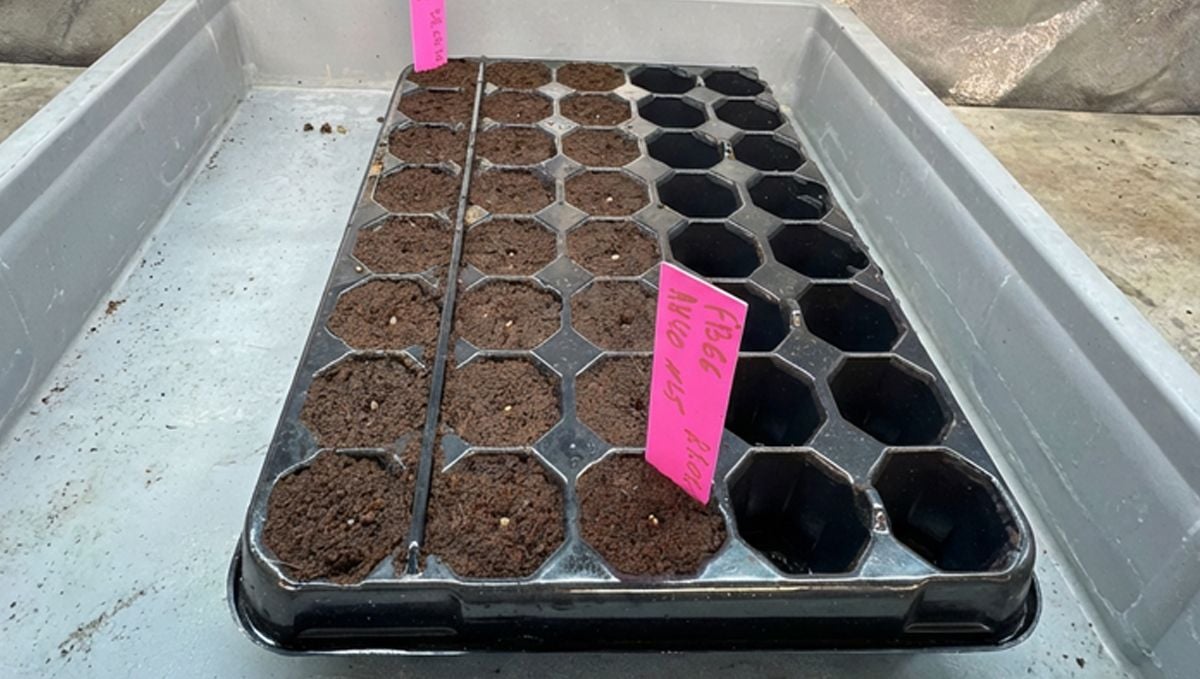
After germination, all seedlings are transferred into Sabika Peat, where they spend the next 3-4 days making their first real push into the world. During this phase, we keep the light intensity gentle, up to 100 PAR, and raise the humidity to make it easier for them to shed their seed shells and open their cotyledons for photosynthesis.
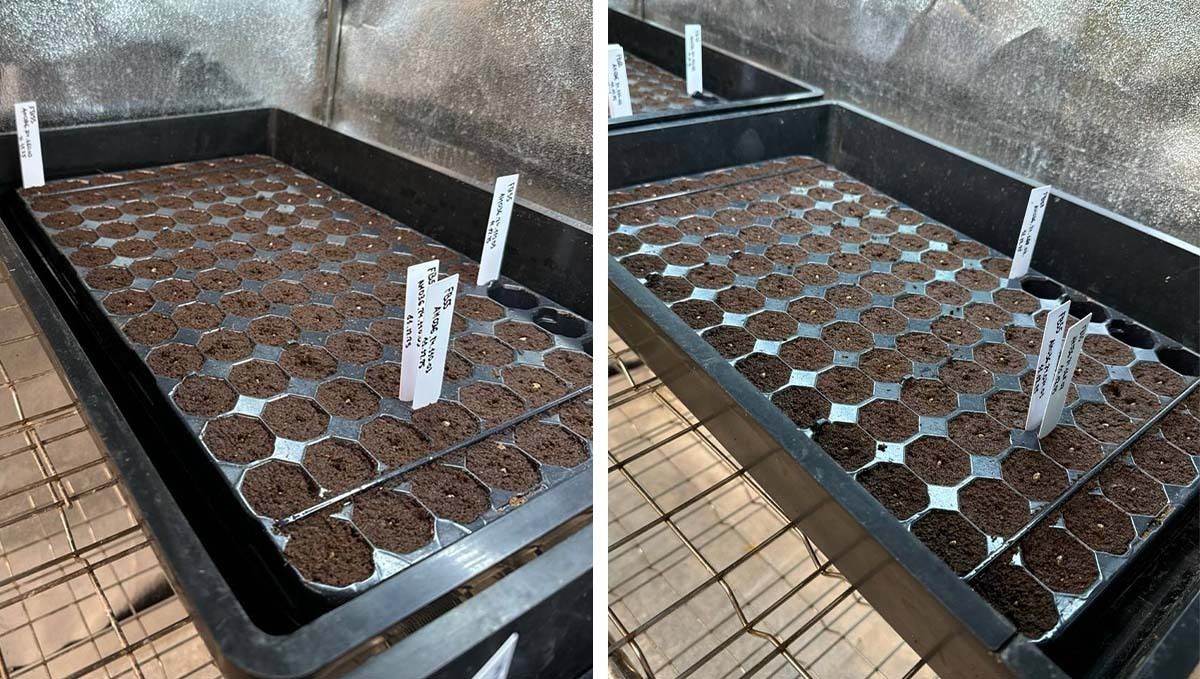
Lemon Cherry Cookies in Sabika

Lemon Cherry Cookies planted in Sabika Konmax

Over the course of four days, you can see the first clear signal that it is time to move on: from below, the seedlings start to break through the Sabika Peat, and most of them have already dropped their shells.

Once the majority stand with clean, open cotyledons, it is the ideal moment to prepare the next substrate. That is when we start mixing coco and get ready for the next transplant stage.

Seedlings almost ready to transplanting


Preparation for Transplant : Setting Up Coco and Environment

For this stage, we prepare the substrate with a simple but effective mix: 90% coco and 10% humus. This is our standard blend, but you must stay especially attentive to plant behavior later during the transition from vegetative phase to preflower we will get into that in a separate entry.

If your coco has been stored in a cold room, always let it warm up to stable room temperature before transplanting. Young, fragile seedlings are highly sensitive at this moment, and even minor temperature stress can slow them down.

Filling 1 gal textil pot

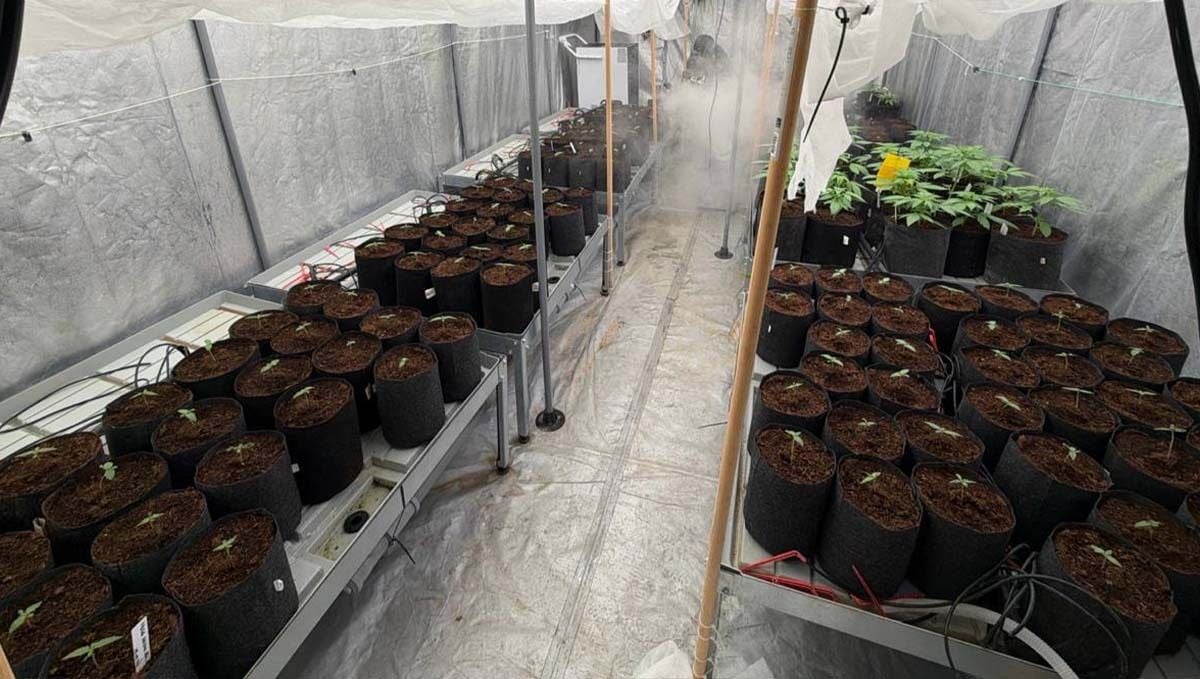
 We carefully fill 1-gallon grow bags with the prepared coco mix, making sure there are no holes, air pockets, or uneven spots in the substrate, but also avoiding over-compaction. This structure helps roots rapidly colonize the entire pot : strong, expansive roots mean a healthy, vigorous plant. For this cycle, 160 one-gallon bags are fully prepared. In each pot, we also create a small planting hole and enrich it with Mykos : a mycorrhizal inoculant that forms a symbiotic relationship with the root system, improving nutrient uptake, root mass development, and overall plant resilience.

Adding Mykos


Next, we dial in the environment climate is a key factor for success. During the first weeks after transplant, seedlings need warmth and high relative humidity: ideally around 24 degrees Celsius (approximately 75 degrees Fahrenheit) and 70-73% RH. This gives us an optimal VPD range of 0.45-0.56, which is perfect for freshly transplanted seedlings.

Light intensity remains gentle at this stage no more than 130 PAR for the first five days. At the same time, we make sure there is active ventilation and a light airflow over the canopy, which works as both training and hardening for young plants.

Once the substrate, climate, and light are on point, it is time to transplant now the seedlings are ready to move into their coco homes.

Transplanting into Coco — First Watering and Root Protection

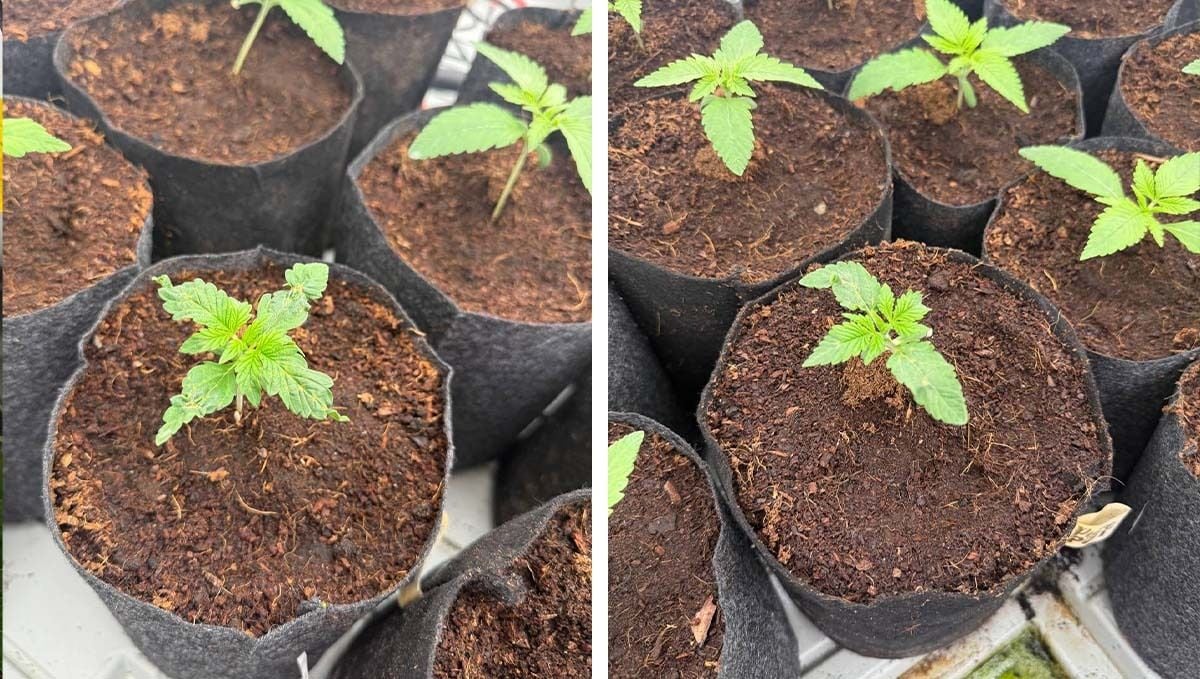
When transplanting into coco, the priority is to protect the delicate root system that has formed in the Sabika trays. Gently remove each plug, making sure not to tear or bend the young roots, then carefully place the plug into the prepared planting hole and lightly backfill with coco so the seedling stands stable but not buried too deep.

Planting

For the first irrigation, we keep the nutrient solution mild, in the range of 0.6-0.8 EC. At this early stage, it is crucial not to give the plants more nutrients than they can actually consume flushing excess salts from coco later is much more complicated than gradually increasing feeding once the plants clearly start demanding more. The pH is adjusted to 5.7-5.9, with a solution temperature of 20-22 degrees Celsius to keep the roots comfortable and active.

First watering

We also add Azos to this first watering, working in synergy with Mykos from the planting hole. Azos is a beneficial nitrogen‑fixing microbe that helps convert atmospheric nitrogen into a plant‑available form, supporting strong early root and vegetative growth, while Mykos (mycorrhizal fungi) extends the effective root zone and improves nutrient and water uptake together they create a powerful biological foundation for young plants.

A volume of around 250 ml per 1-gallon pot is enough in the conditions we set up earlier, and this initial watering will comfortably sustain the seedlings for the next two days before the substrate begins to dry back and invites the next irrigation.

Smooth Transition into Active Vegetative Growth
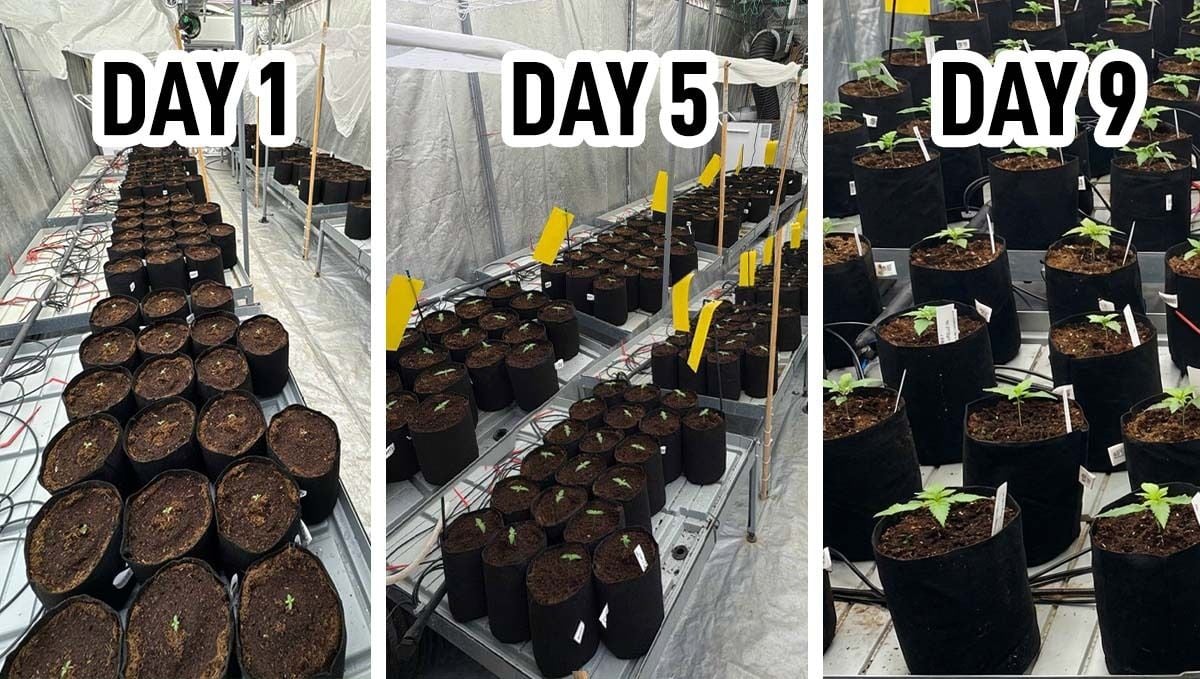
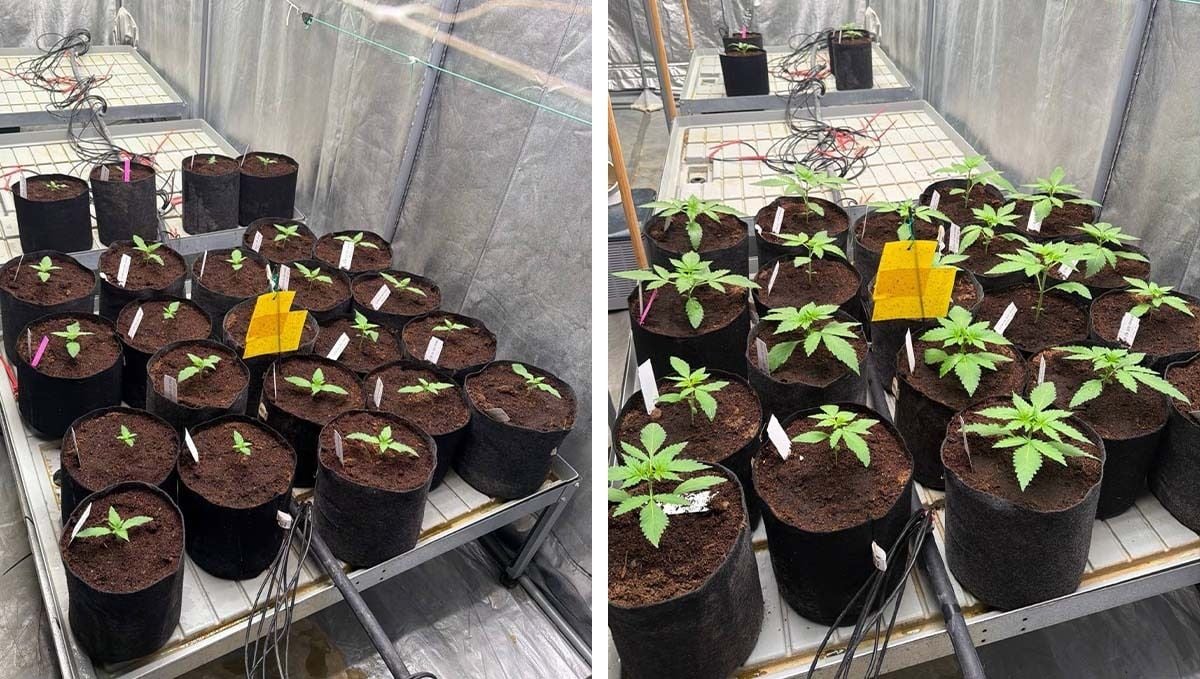
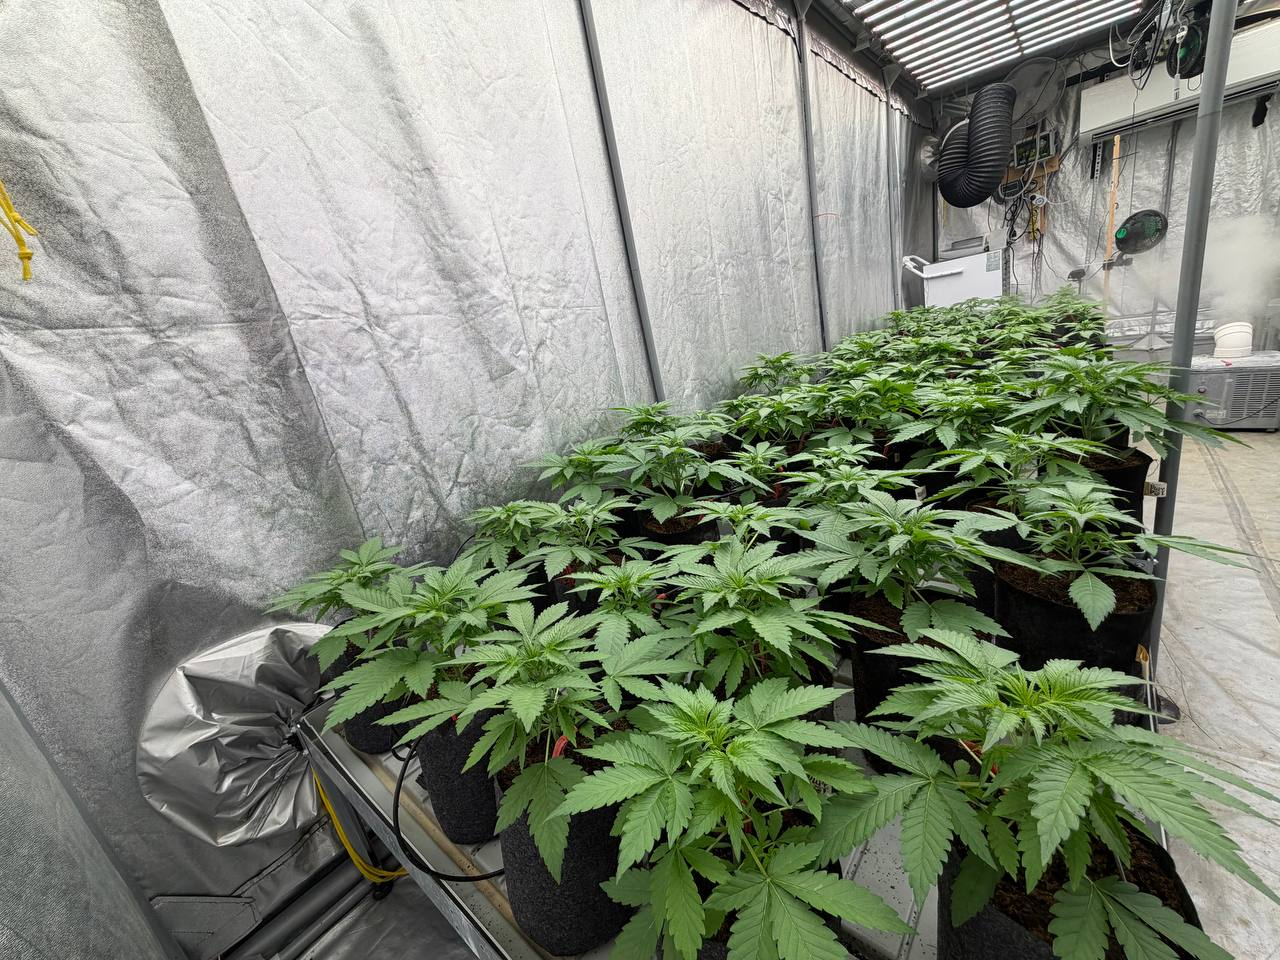
Lemon Cherry Cookies 1 - 9 Days

Lemon Cherry Cookies Auto 1-9 days

Now we are really in the game from here, the plants begin their steady transition into active vegetative growth.

Over the next two and a half weeks, we rely entirely on controlled hand‑watering, carefully adjusting the volume only as the plants actually demand more. This is a heavy workload, but it gives us full control over each pot’s dry‑back and root development, setting a clean foundation before switching to automation.

From the second week, as plants gain mass and start feeding more aggressively, the nutrient solution can be gradually increased up to 1.0 EC to match their rising demand.

We are already looking forward to connecting the automatic irrigation system, but until then it is all about precision and consistency.

Early Selection Continues


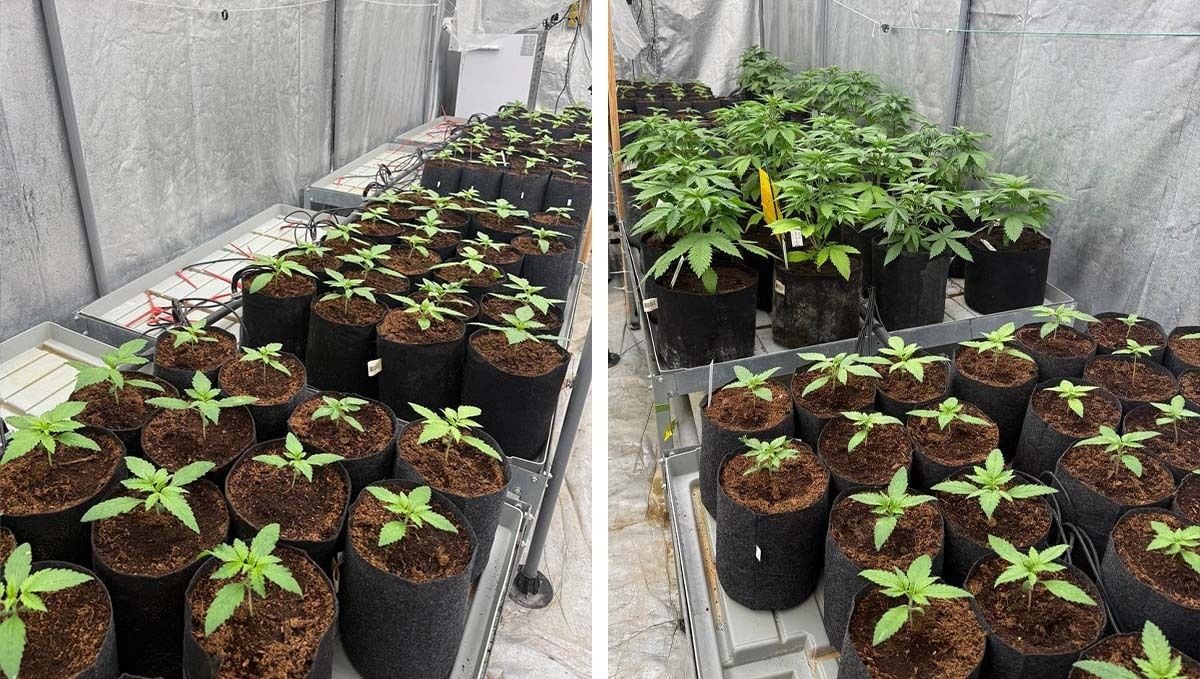
Another week has passed in our Lemon Cherry Cookies run, and the plants have continued to develop steadily. Growth over this period has been clearly visible, with most individuals maintaining a strong and uniform pace.
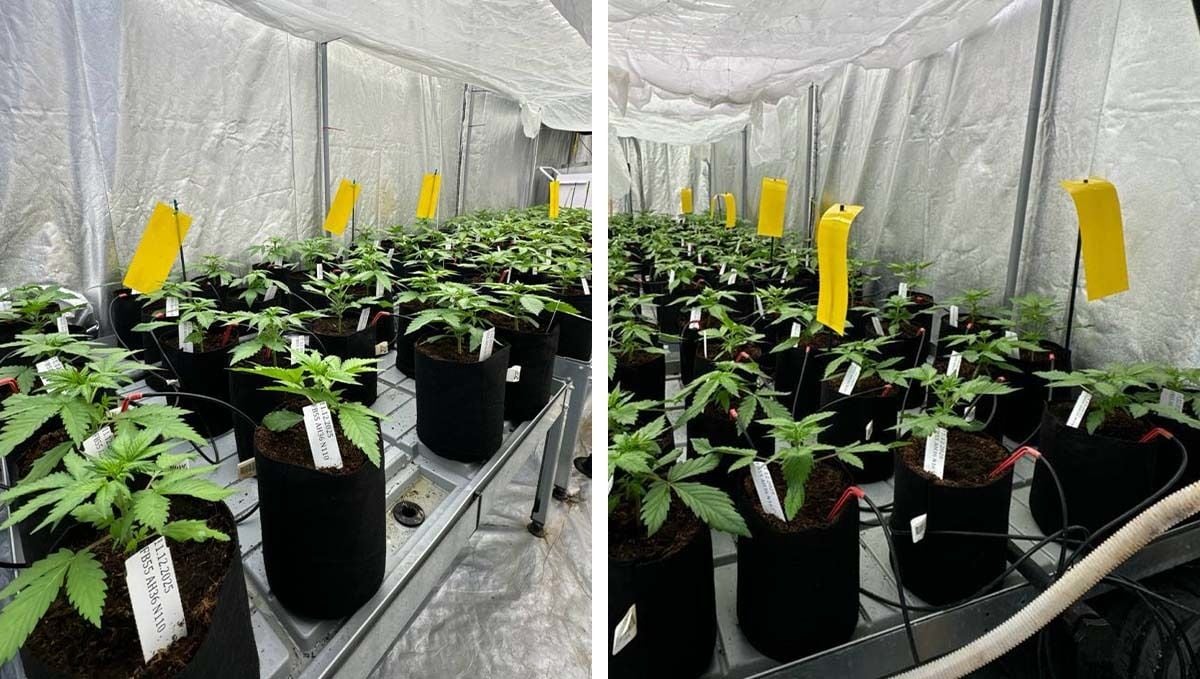
Early Selection

Early Selection

At this stage, small differences begin to appear. We can already identify a few plants that are slightly lagging behind the main group. These are not major deviations, but even minimal inconsistency at this point is enough for us to take action.

In total, this represents only around 3 to 6 plants, but they are removed immediately. If a plant does not meet our expectations from the start, we do not keep it just to fill space. Every position in the cycle must be occupied by a plant that fully aligns with our standards.
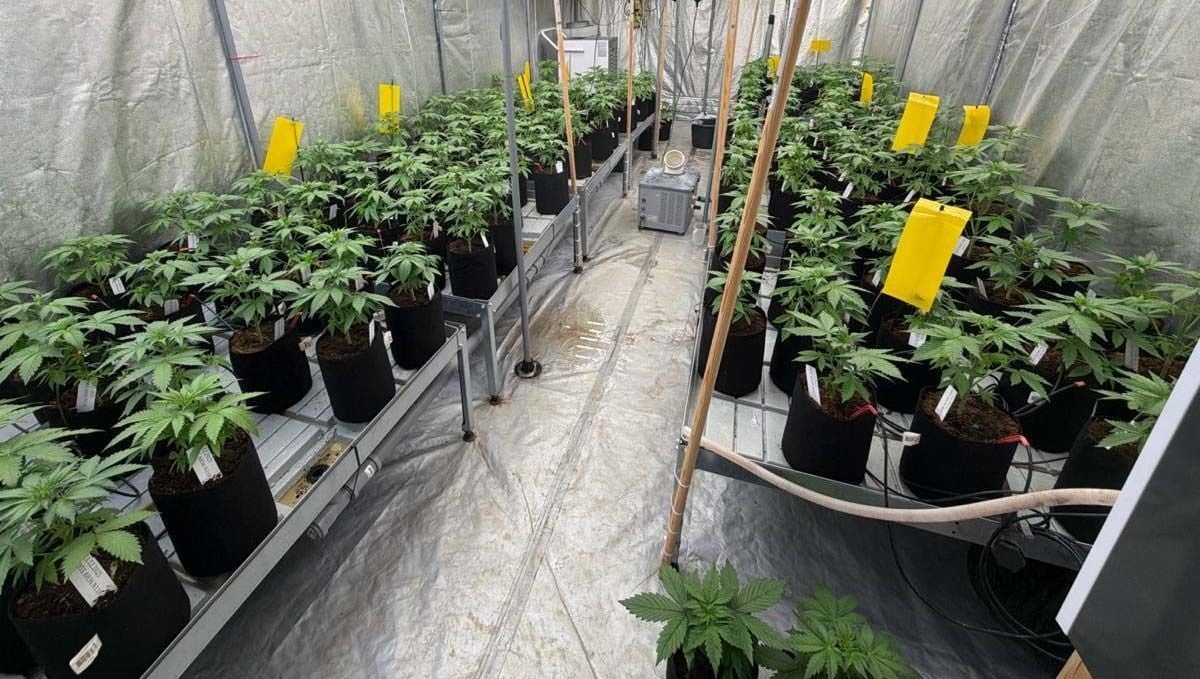
Overall View at This Stage

Overall View at This Stage

This approach keeps the population clean, balanced, and focused on quality. As a result, the remaining plants continue to develop in a more uniform and controlled environment, which becomes increasingly important as the cycle moves forward.

Two Weeks of Growth


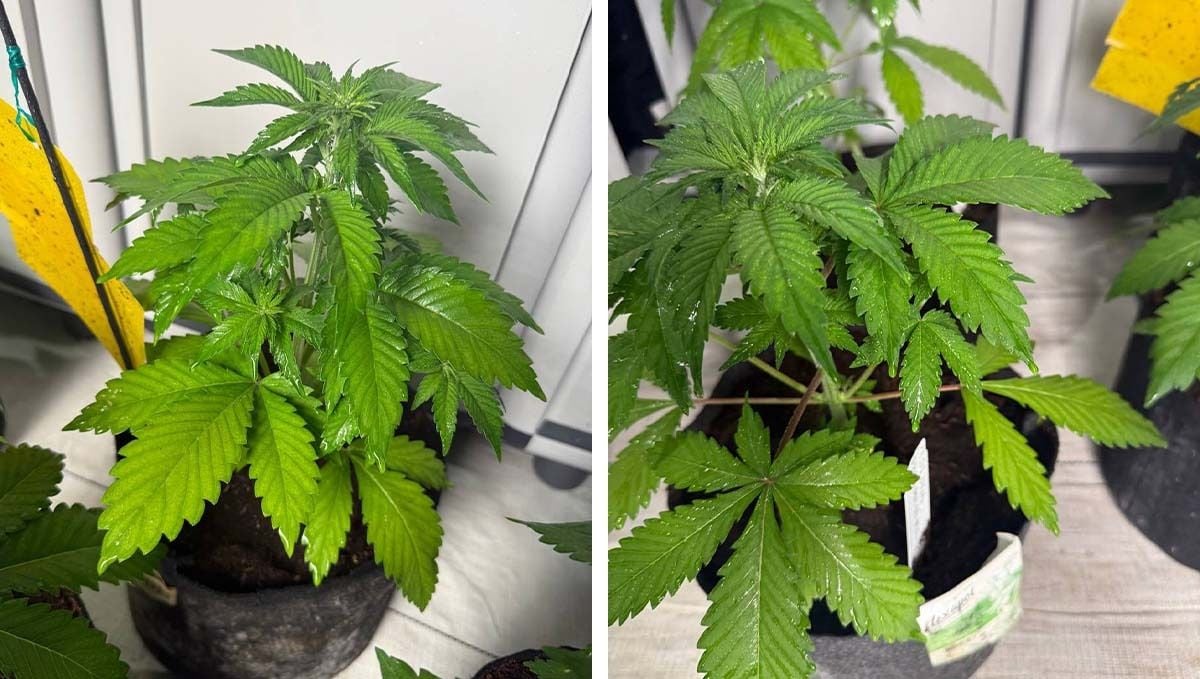
Around two weeks of growth have passed, and our Lemon Cherry Cookies have reached a point where proper selection can now be carried out.

The plants have developed enough structure to clearly show differences in vigor, balance, and overall behavior.

In the video, you can see how the primary selection is being performed.

This is not the final selection of the fathers, but an important early filtering stage.

At the same time, mothers that do not meet our criteria are removed from the cycle.

Only plants that match our expectations in structure, stability, and growth behavior are allowed to continue.

Selection of Lemon Cherry Cookies

At the same time, the males have already been treated with STS and are moving toward the stage where they will soon be ready to release pollen. Their development is progressing as expected, and timing across the cycle remains well aligned.
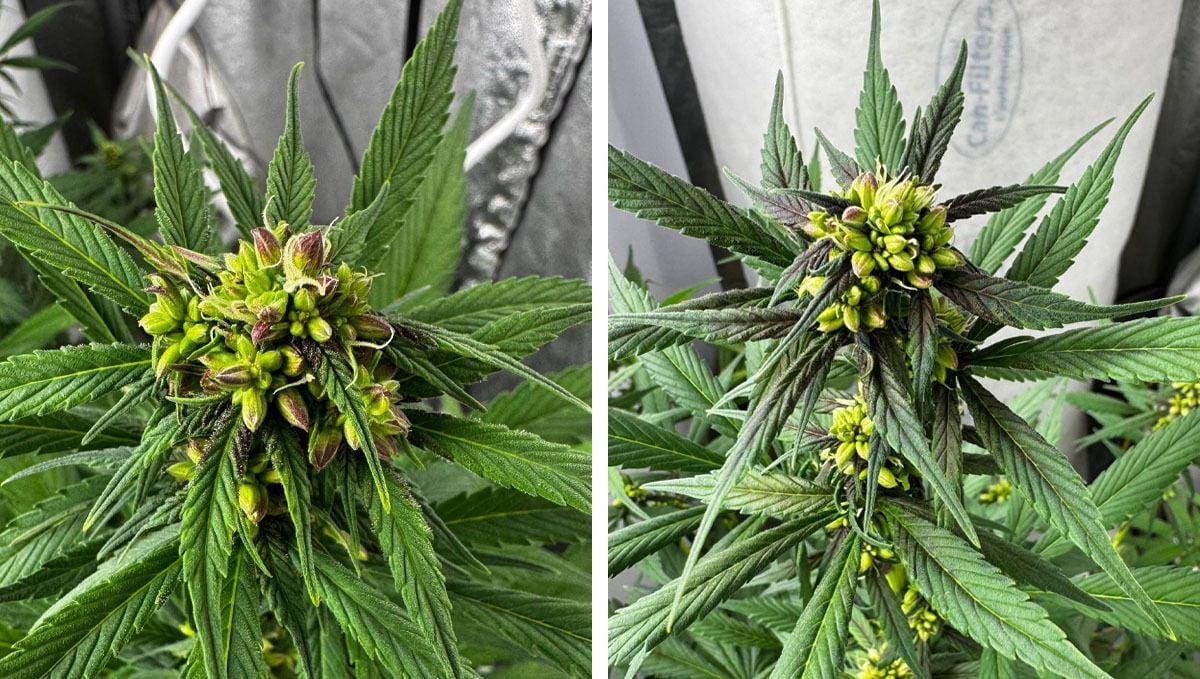
Males of Lemon Cherry Cookies

Males of Lemon Cherry Cookies

 
Defoliation Stage


After completing the selection process, we move into defoliation. This is a key stage in the cycle and should not be overlooked.

Removing large fan leaves and performing lollipopping by clearing the lower skirts helps reshape the plant structure and prepare it for the next phase.

Defoliation before pollination

These actions significantly improve airflow within the middle layers of the canopy and allow light to reach deeper into the plant. As a result, growth becomes more directed and efficient, and the plant is able to develop in a more controlled and balanced way.

Proper defoliation at this stage creates the conditions needed for strong and uniform progression into the next phase of the cycle.

 Perfect Timing


At this stage, we move into one of the most important moments of the entire cycle – selecting the right window for pollination. By now, the males are fully ready and showing strong, stable expression. Their development has reached the point where pollen production is imminent.

However, readiness of the males alone is not enough. Timing must be perfectly aligned with the mothers. For successful pollination, stigmas must be properly formed and fully receptive. This is a very specific window, and missing it can directly affect the overall result.

Pollination of Lemon Cherry Cookies

In our case, we have hit this window exactly as planned. The mothers are at the right stage, with well-developed stigmas ready to receive pollen, while the fathers are fully prepared to deliver it. This synchronization is the result of careful planning and precise control throughout the entire cycle.

From this point forward, we enter an active pollination phase that will last approximately 7 to 10 days. During this period, pollination will be carried out consistently to ensure full coverage and strong seed development across the entire population.

This is where the cycle truly comes together, and where the future of the next generation is defined.

Post-Pollination Routine : Shaping the Final Lineup
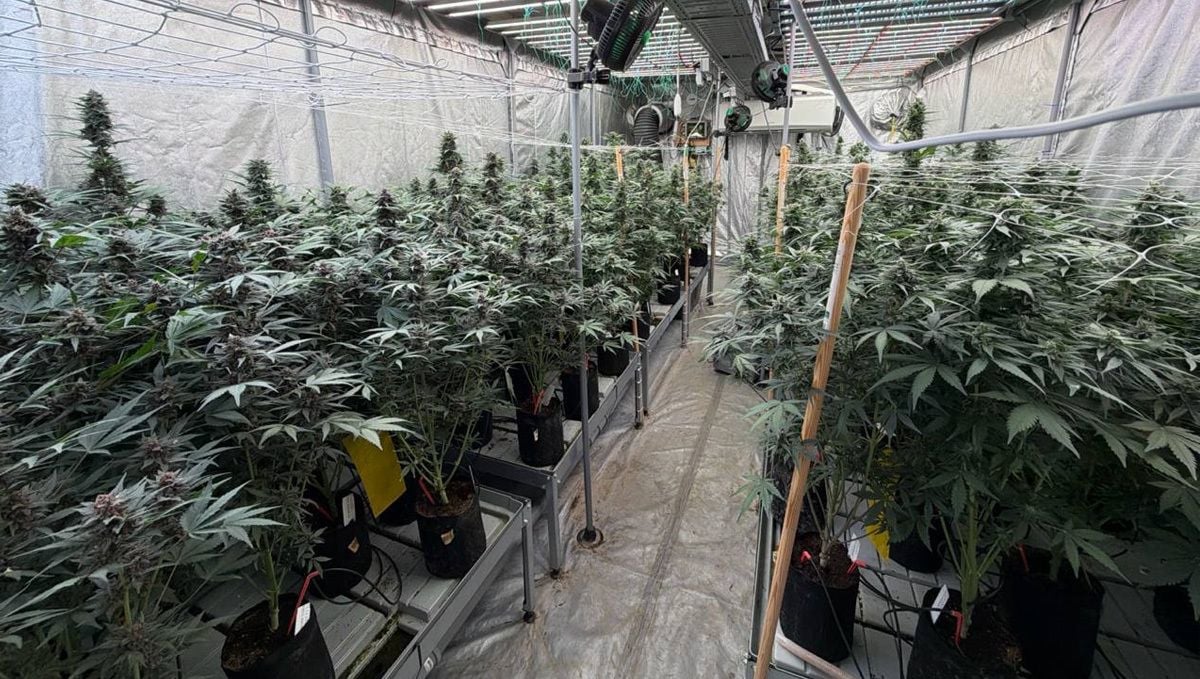
Lemon Cherry Cookies Jungle

Lemon Cherry Cookies : After Pollination

After successful pollination, each plant goes through a strict selection based on a full set of predefined criteria, followed by grouping and arranging plants by phenotype expression. If a plant does not meet the required parameters, it is removed from the production run immediately, without compromise.

Once this selection stage is complete and only the best keepers in each phenotype group remain in the grow room until the end, it is time for a thorough defoliation. All weak or unproductive branches are removed, giving the plants more space to breathe and grow, allowing light to penetrate deep into the lower canopy for even seed maturation and helping to normalize airflow throughout the room.

In this cycle, after selection and phenotype sorting, we ended up with 67 plants that earned the right to stay until harvest.

Lemon Cherry Cookies : Post-Pollination Defoliation Timelapse

Two Weeks Before Harvest : Data, Color and Harvest Prep
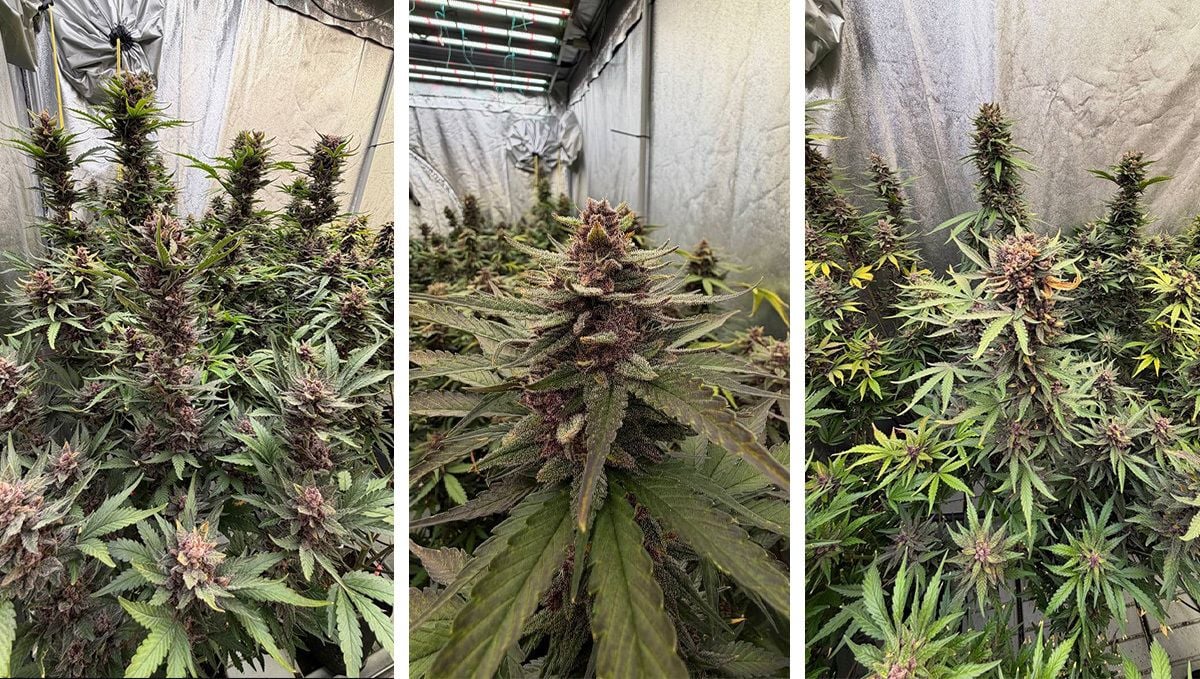
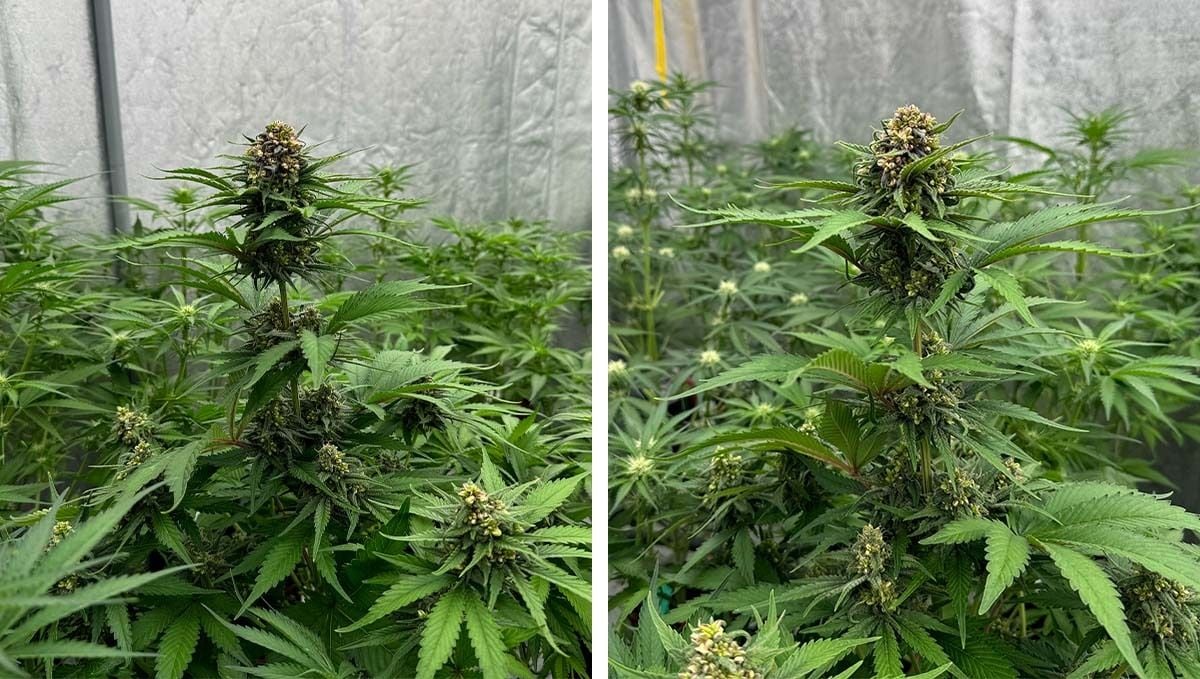
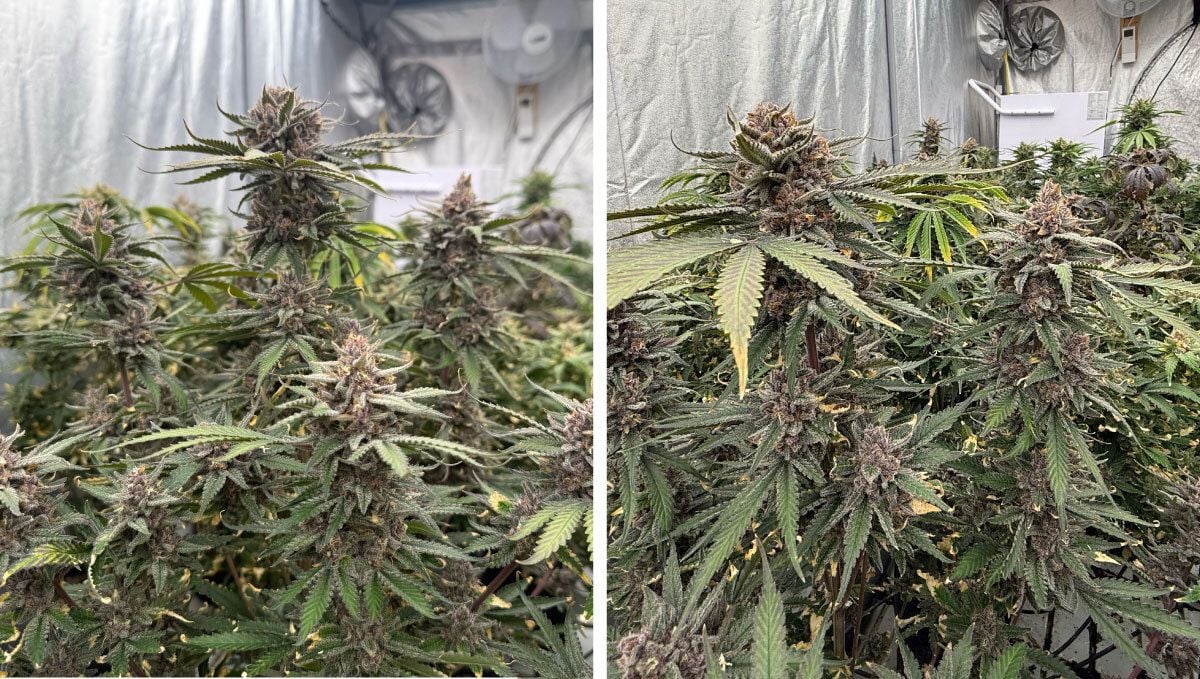
Lemon Cherry Cookies : 14 Days Before Harvest

Lemon Cherry Cookies : 14 Days Before Harvest

By this point, the buds are fully formed and every plant has settled into its true color and expression.

At around day −14 before harvest, it is time to lock everything in: all key parameters for each plant are recorded, and a final document is created for the entire run. A full set of pre-harvest photos captures each keeper in its final state before the chop, so every plant has its own history for future reference.

Over the following 14 days, the room slowly shifts into an artificial autumn. Each day, light intensity is reduced step by step, encouraging the plants to finish, fade and redirect their remaining energy into the seeds. At the same time, the plants naturally start drinking less, so irrigation has to be strictly controlled.

If earlier they were on automatic watering 5–6 times per day, during these last two weeks individual events are gradually removed from the schedule. Too much water at this stage means excess moisture in the medium, which is the opposite of what is needed. The goal is to keep a careful balance where the substrate slightly dries back overnight, helping the plants to finish clean, without stress or over-saturation.

Lemon Cherry Cookies : Two Weeks Before Harvest

Harvest Complete


And just like that, our Lemon Cherry Cookies cycle has come to an end. And honestly, it was a beautiful one. Each harvest brings a sense of pride in the work that goes into every stage of the process. From early selection to final pollination, every step played its role in shaping the outcome.

However, this is not the end of the story. This part of the blog may be complete, but there is still much more ahead. In the upcoming updates, we will show how the seeds are processed after harvest, how they are prepared, cleaned, and stored.
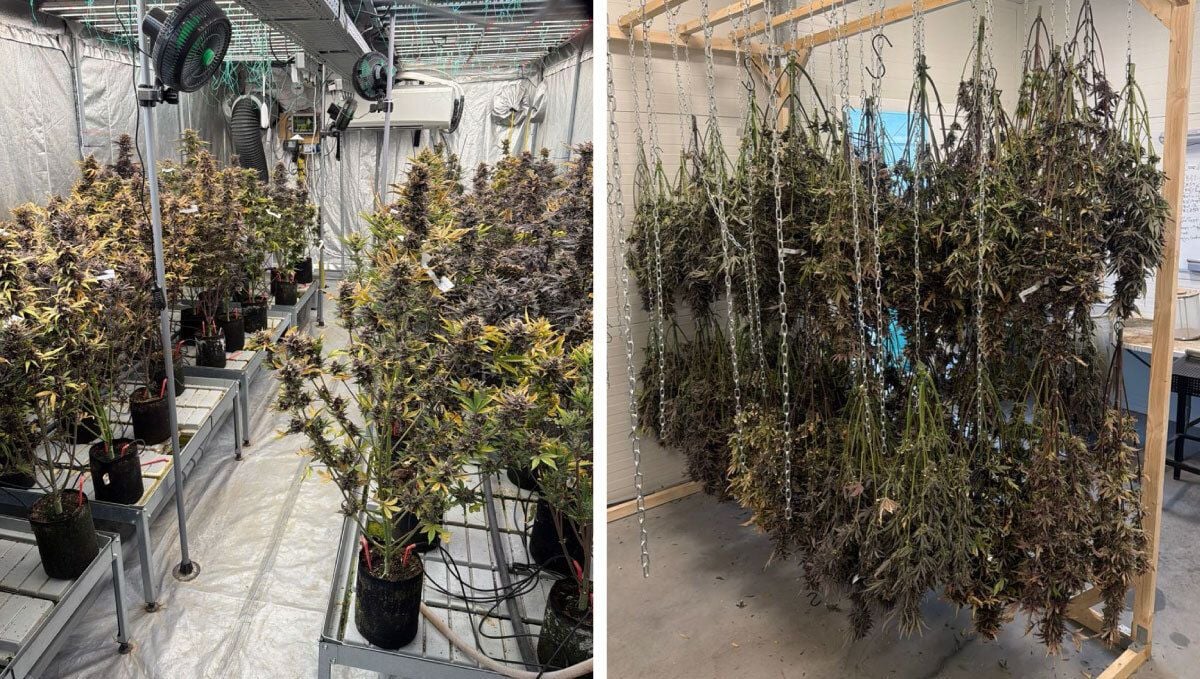
Harvest

Harvest of Lemon Cherry Cookies

Most importantly, the journey continues with a full testing cycle of the next generation. What we have produced now will go through another complete run, this time focused on flower production rather than seed making. Over the next four months, we will observe how these genetics perform in terms of structure, bud formation, and overall expression.

This stage is one of the most important parts of our work. It allows us to truly understand the result we have achieved and determine which lines are ready to move forward.

The cycle may be complete, but the real evaluation is just beginning.

New iteration of Cherry Cola in progress

Soaking seeds of Cherry Cola Auto

We are officially starting a new Cherry Cola Auto cycle. As in all our production runs, the process begins with the future fathers. This familiar and proven approach allows us to build the entire cycle on a predictable and controlled foundation.

The males seeds have been soaked

Soaked males seeds

The seeds for the males were first soaked in plain water, giving them enough time to fully activate before planting. Once ready, they were transferred into peat starter plugs. This is the same method we consistently use for clean starts and stable early development, and it has proven its reliability across many cycles.

We are starting this cycle with 25 fathers, with the goal of narrowing the selection down to the 2 strongest individuals for the final stage. Only the most stable, vigorous, and genetically consistent males will move forward.

SABIKA peat sponges

SABIKA peat sponges

At this stage, the focus is not on speed, but on creating the right conditions for calm and even growth. A strong and stable start in the earliest phase sets the tone for everything that follows later in the cycle.

We apply the same methodology here that we use across all our projects. Additional techniques and alternative approaches are covered in a separate article. For this run, however, we stick to a simple, repeatable, and effective process.

With the fathers now established, the Cherry Cola Auto cycle is officially underway. This is the first step toward shaping the next iteration of the line, and we will continue documenting each phase as the cycle progresses.

Transplanting the Future Fathers


We have officially transplanted our future fathers into coco. The substrate is prepared using our standard 85/15 blend of coco and humus. This balance provides both structural aeration and a stable organic component that supports early root development.

The future fathers have been planted

The future fathers have been planted

The males have now settled into the medium, and in the image you can clearly see the difference in growth over just one week. Cherry Cola Auto is already demonstrating strong early stability, which is always a positive sign. When plants move evenly from the start, it indicates that the genetics are behaving as expected and adapting well to the environment.

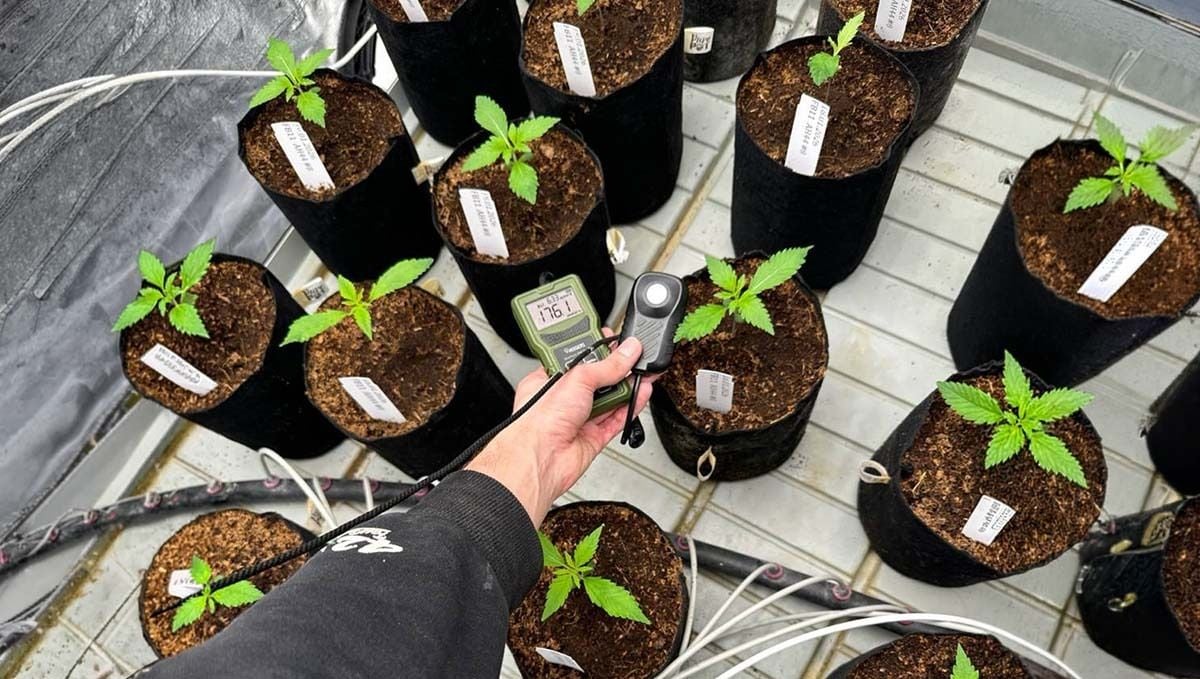
At the very beginning of the cycle, right after transplanting young seedlings, we keep the light intensity relatively low at 120 to 170 PPFD. The priority during this stage is simple. No stress. The plants must focus on root establishment and steady vegetative growth.

PPFD Values

PPFD Values

Daily monitoring, often several times per day, gives us confidence that everything remains under control. At this phase, it is crucial not to overwater and not to overpower the plants with excessive light. Autoflower genetics are sensitive during early development. Even minor stress at this stage can affect the entire cycle later on.

Introducing the Future Mothers

After some time, we introduce the future mothers into the system. The principle remains the same as with the fathers. The same substrate mix, the same careful handling, and the same attention to early environmental balance.

Planting the Future Mothers Cherry Cola Auto

We are officially starting this phase of the cycle with 154 mother plants. This number sets the scale for the project and gives us a strong base for selection moving forward.

Launching the cycle with this volume allows us to observe a wide spectrum of expression while maintaining control over structure and uniformity. Each plant now becomes part of a larger comparison process, where stability, vigor, and genetic integrity will be closely evaluated.

Planting Mother plants

Mother plants in grow space

At this stage, the focus is not on quantity, but on identifying quality within that number. From these 154 mothers, only the strongest, most balanced, and most consistent individuals will continue through the cycle. The rest will be removed without hesitation.

This is where real work begins. Structure is set, spacing is defined, and the next weeks will reveal which plants truly deserve to move forward.

Growth Comparison & Visual Development


In the photos, you can observe the growth difference of the mothers over a single week. The development is clearly visible, and structure is beginning to define itself.

Visual Development

Visual Development

Take a closer look at the fathers as well. They are looking very promising at this stage. However, it is still too early to select the best individuals. In this particular project, we are not only evaluating structural identity and vigor. We are also waiting for the expression of a strong purple pigmentation, which will reveal itself slightly later in development. That characteristic will play a key role in final selection.

Primary Selection


Around 7 to 10 days after the mothers begin active growth, we move into the first selection stage. At this point, any plants that show even minimal stress responses are removed. Stress can come from cooler irrigation water, changes in light intensity, or slight environmental shifts.

If a plant reacts negatively to such minor factors, it does not meet our standard. Our objective is to preserve only those individuals that demonstrate resilience, stability, and strong genetic expression from the very beginning. All weak or unstable seedlings are eliminated immediately.
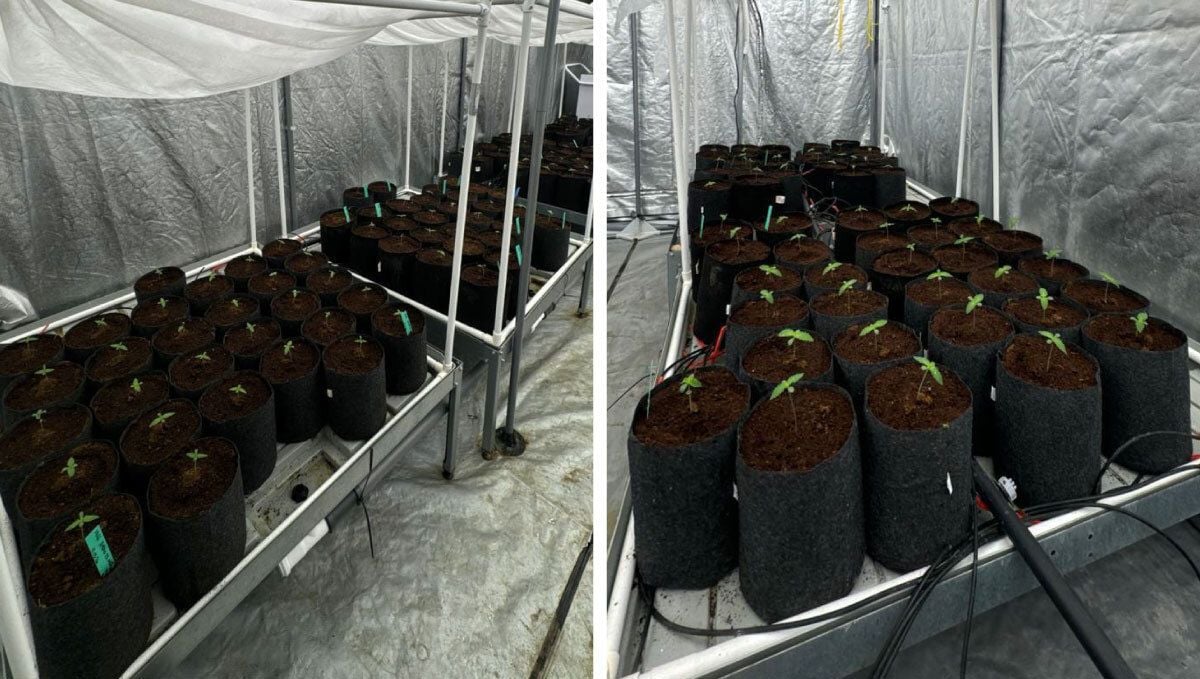
First Selection

First Selection

From here, the focus shifts to careful observation. We continue monitoring development closely, removing any undesirable expressions in structure or behavior. At the same time, we highlight the strongest performers. The plants that consistently show vigorous growth, structural balance, and solid genetic strength become the foundation for the next stage of the cycle.

Stay tuned for further updates as Cherry Cola Auto continues to develop.

Reversal Phase Begins


The time has come for the first STS application, and all future fathers have been relocated to a separate controlled area for this stage. Isolation during spraying is essential to maintain safety and precision throughout the process.

All treatments are carried out strictly in protective suits and masks. STS is a highly reactive and toxic compound, and proper safety protocol is non-negotiable. Controlled handling ensures both team safety and consistency of application.

First application STS

First application STS

The first heavy spray is the foundation of the entire reversal process. Coverage must be thorough, with every leaf visibly wet. This initial application plays a critical role in signaling the plant to begin transitioning from female expression toward male development.

At this stage, precision and timing define the outcome. A strong and properly executed first application significantly increases the probability of achieving a stable and complete reversal. From here, we move into observation mode, carefully monitoring plant response over the coming days.

 The first mistakes and the resulting selection. 

 After about a week, we noticed in time that part of our plants began showing the problems on the leaf surface, such as burn marks on the leaf tissue.

Burned leaves on Cherry Cola

After investigating, we discovered that the system controlling pH and nutrient delivery in this grow room had malfunctioned. For about three days, an unstable and uncontrolled dose of nitric acid and fertilizers was being supplied, and the plants reacted immediately to this failure.

Selection of Cherry Cola

As a result, the system was brought back to normal, and we unfortunately had to say goodbye to the affected plants.

Cherry Cola after selection

At times, it’s hard to part with some plants, but that’s the nature of any production. The rules are simple: strict selection — only the best remain, those that have passed all criteria. In our case, resistance to stress is just as important a factor. 

Pre-flowering and plant arrangement.

Cherry cola from veg to flower


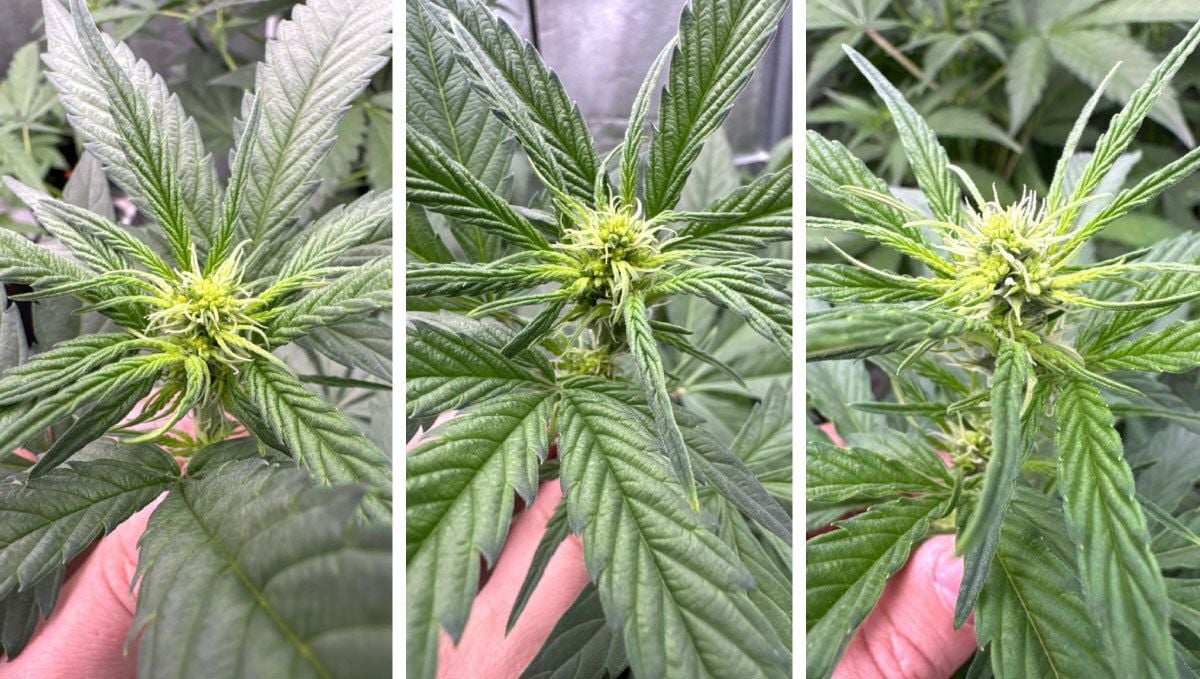
At a time when the father plants have already gone through several rounds of spraying and are beginning to enter the pre-flowering stage, the mother plants are only just transitioning from vegetation into flowering. During this period, the plants begin to consume a lot of energy, expand rapidly, and produce their first stigmas.
Arrangement of Cherry cola on pre flovering

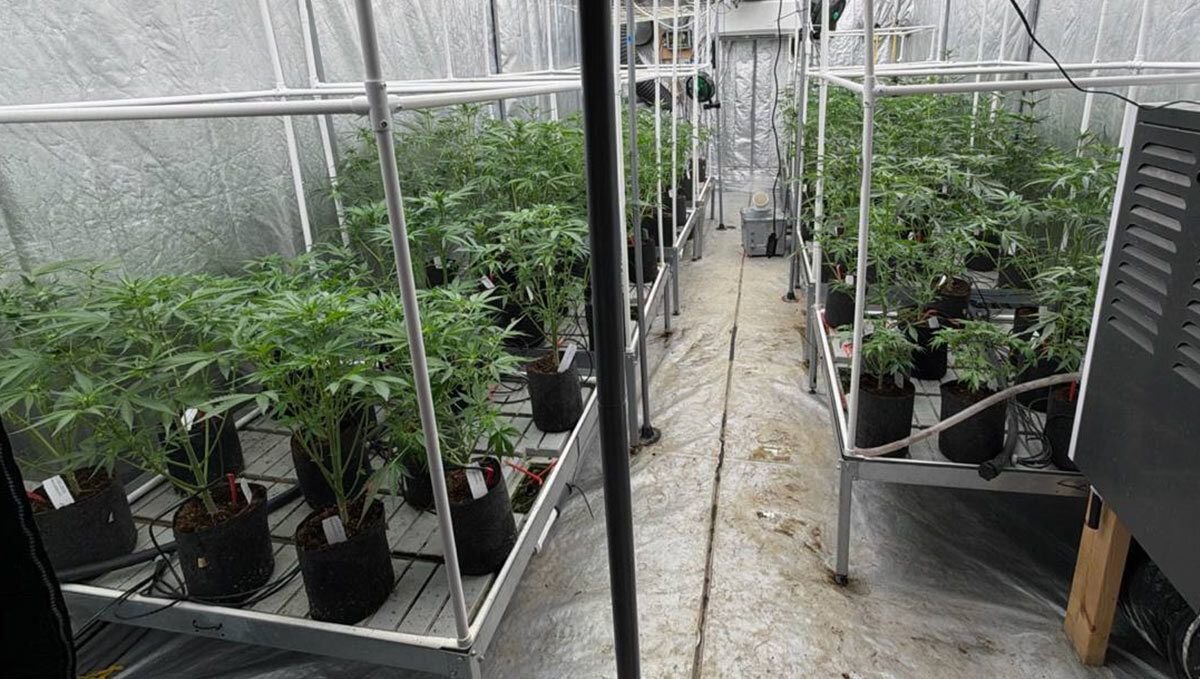
Although this strain is known for its compact growth and relatively small size, it’s still important to arrange the plants in a way that ensures each one has enough space and remains comfortable. 

The beginning of flowering.

 In just a week, we can already see how rapidly the plants have expanded and filled out with foliage. Now our task is to make sure all the mother plants are comfortable in the space – removing excess leaves to improve airflow between the plants and ensure that each cola receives enough light.

Deleafing of cherry cola

The next stage is selection based on plant structure. Since this is a purple strain, the selection at this point will be fairly straightforward – we need to level all the plants in terms of height, structure, and flowering timing so that they are as uniform as possible. In the end, 20% of the plants were removed at this stage.

Selection of Cherry Cola

The main selection will take place later, where we will divide the plants into several groups: early Purple and standard-timing Purple. This will result in two genotypes that are very similar to each other, but differ in how quickly they develop their coloration. At this stage, we are left with around 90 plants out of the initial 154.

 Preparation for pollination. 

Male plants of Cherry cola

Ripe males of Cherry Cola

In just a week, the plants have once again filled out with foliage, which could interfere with pollen reaching the middle and lower colas. Therefore, we will remove the bulk of the leaves to ensure better pollination.

Finally Deleafing of Cherry cola

And here we have – the mother plants are ready for pollination, the stigmas have opened and ready to get a polen,  and in the same time fathers are filling their sacs with pollen, just ready to polinate the mothers. 

Prepared mother plants for pollination


In just a few days, the father plants will begin to open their pollen sacs and release the pollen they have produced.  Take a look at this stunning color and the swelling pollen sacs – they are just about to burst and begin fertilizing the mother plants.

Active Pollination Phase


Following the opening of the pollination window, we moved into a structured and consistent pollination phase. For approximately two weeks, the entire room was actively pollinated, making full use of the available pollen from the selected fathers. The goal at this stage was simple. Maximize coverage and ensure that every receptive site received pollen.

Active Pollination Phase

Active Pollination Phase

During this period, we focused on maintaining stability. No additional stress was introduced. We avoided any defoliation or structural changes while pollination was ongoing. Even though the canopy became quite dense and space was limited, preserving a calm and stable environment was more important than making adjustments.

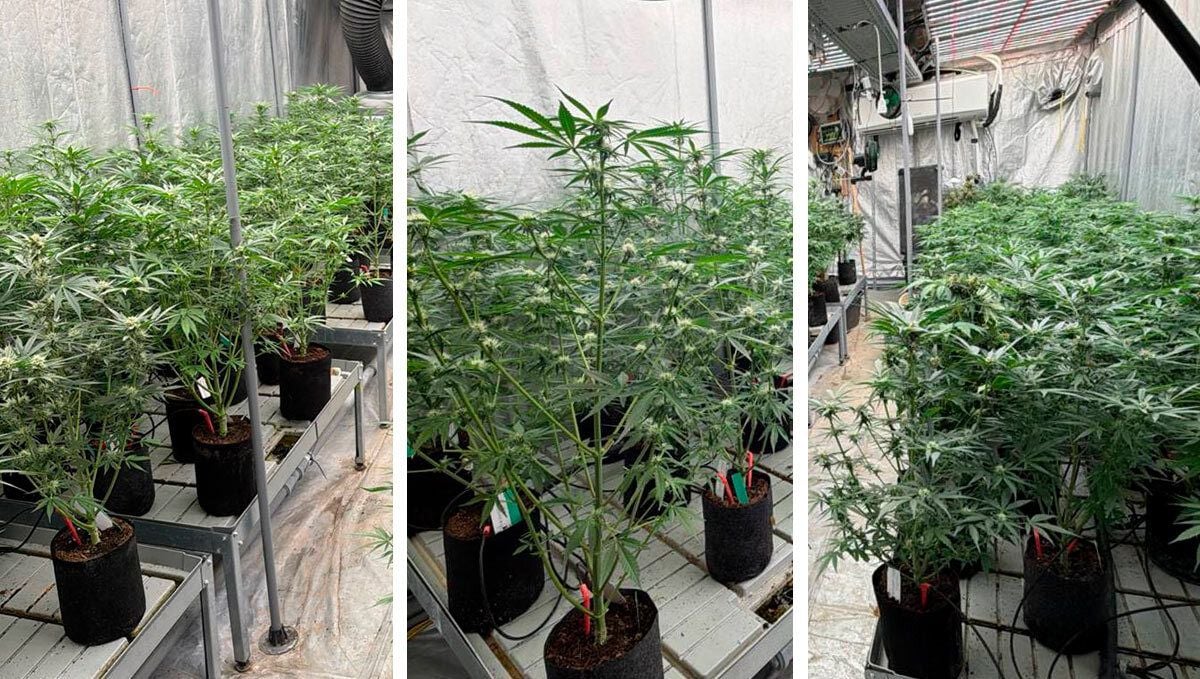
In the photo collages, you can clearly see the progression of growth and development throughout this phase. The plants continued to build structure while simultaneously moving into seed formation.

Post-Pollination Development


After the pollination phase, we performed defoliation to open up the canopy. It became clear that areas with limited light exposure had weaker side colas. However, once the leaves were removed and light penetration improved, these zones began to recover and continue their development.

Post-Pollination Development

Post-Pollination Development

This stage highlights how responsive the plants are when given proper conditions. Even delayed areas can catch up once the structure is corrected.

Seed Formation & Flower Development


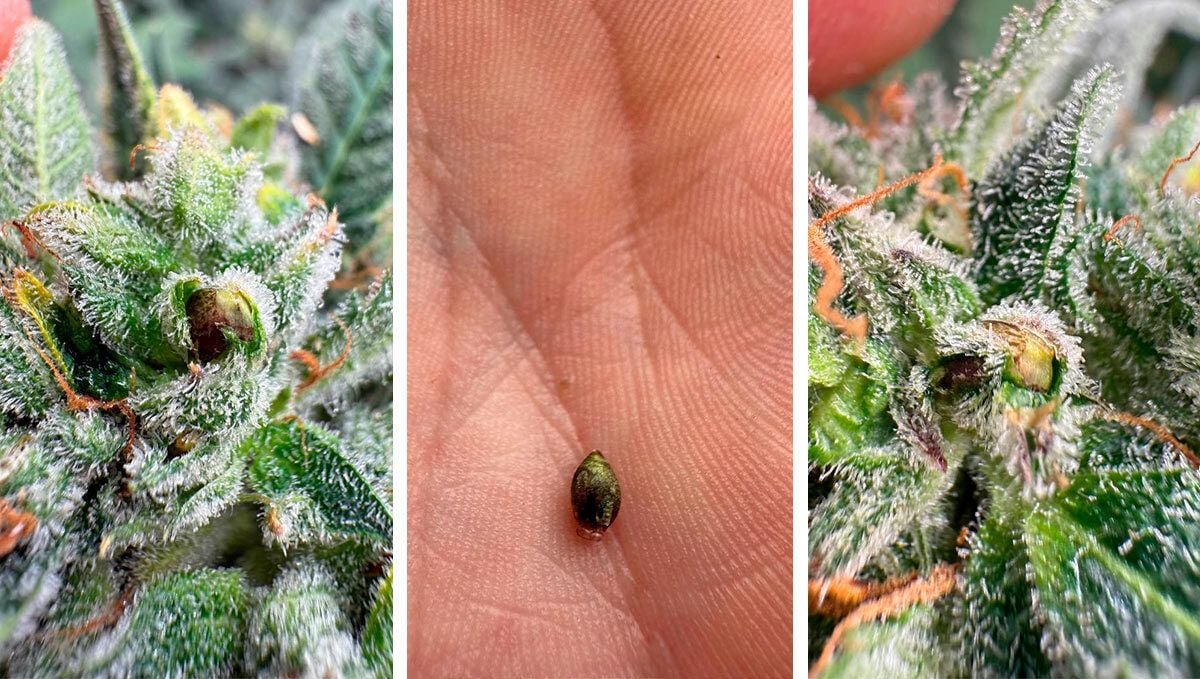
As time progressed, seed development became clearly visible. The plants shifted their energy toward building and maturing seeds, while the flowers continued to gain mass around them.

Seed Formation

Seed Formation

It is important to understand that a seed production cycle differs significantly from a flower-focused cycle. If these plants were grown purely for flowers, the buds would be larger. However, in this case, energy is redirected into seed formation, which defines the final structure of the plant.

Post-Pollination View

Post-Pollination View

After-before defoliation

Final Stage


At this moment, we are entering the final stage of the cycle. The plants now require time to fully mature and complete their development. Approximately three weeks remain before harvest.

Final Stage

Final Stage

From here, the process becomes more about patience than intervention. Allowing the plants to finish properly is key to achieving a stable and high-quality final result.

Final Stage — Ripening and Phenotype Reveal

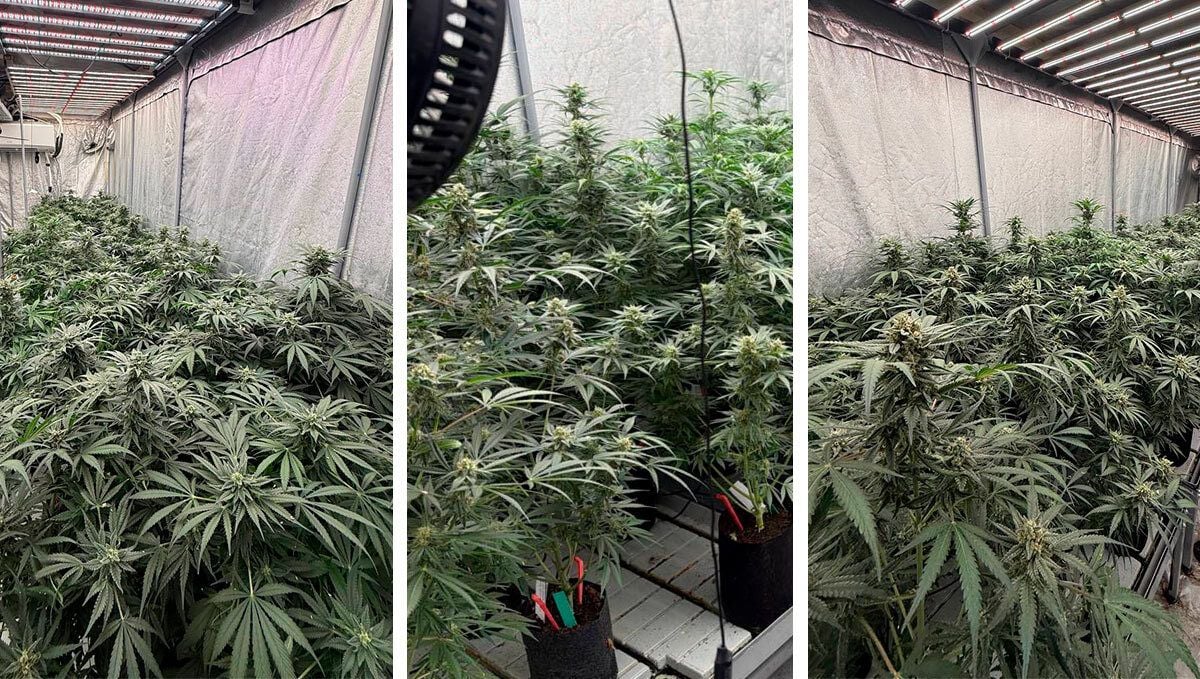
Cherry Cola RF3: Two Weeks Before Harvest

Cherry Cola RF3: Two Weeks Before Harvest

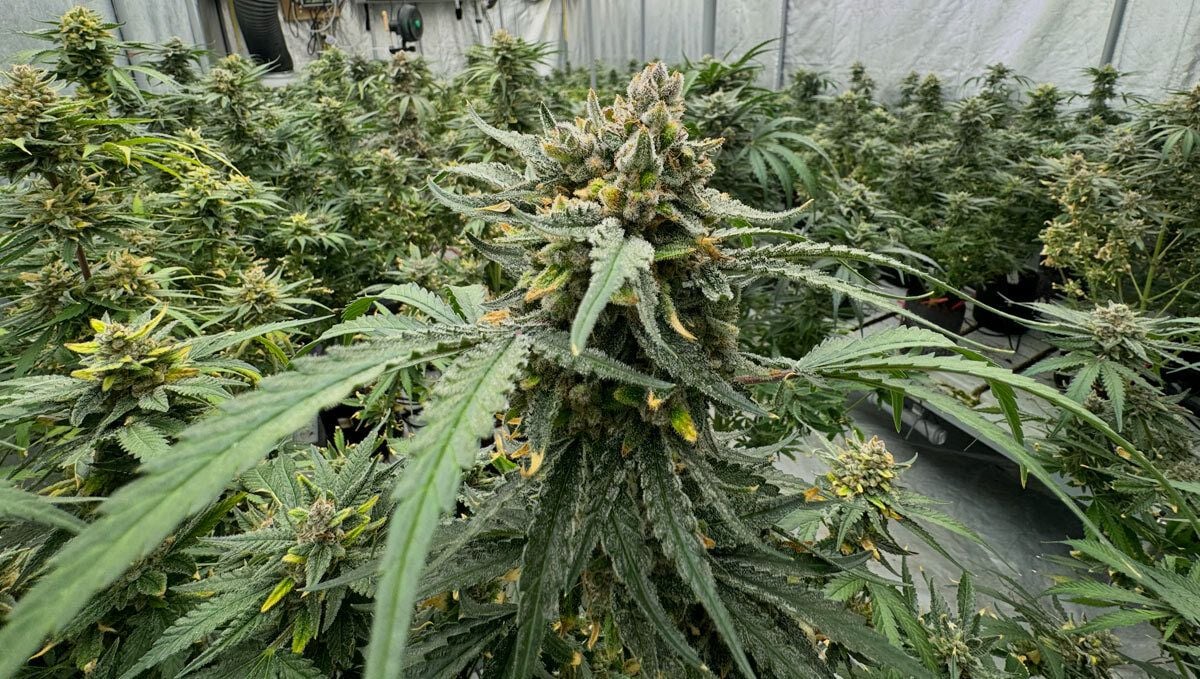
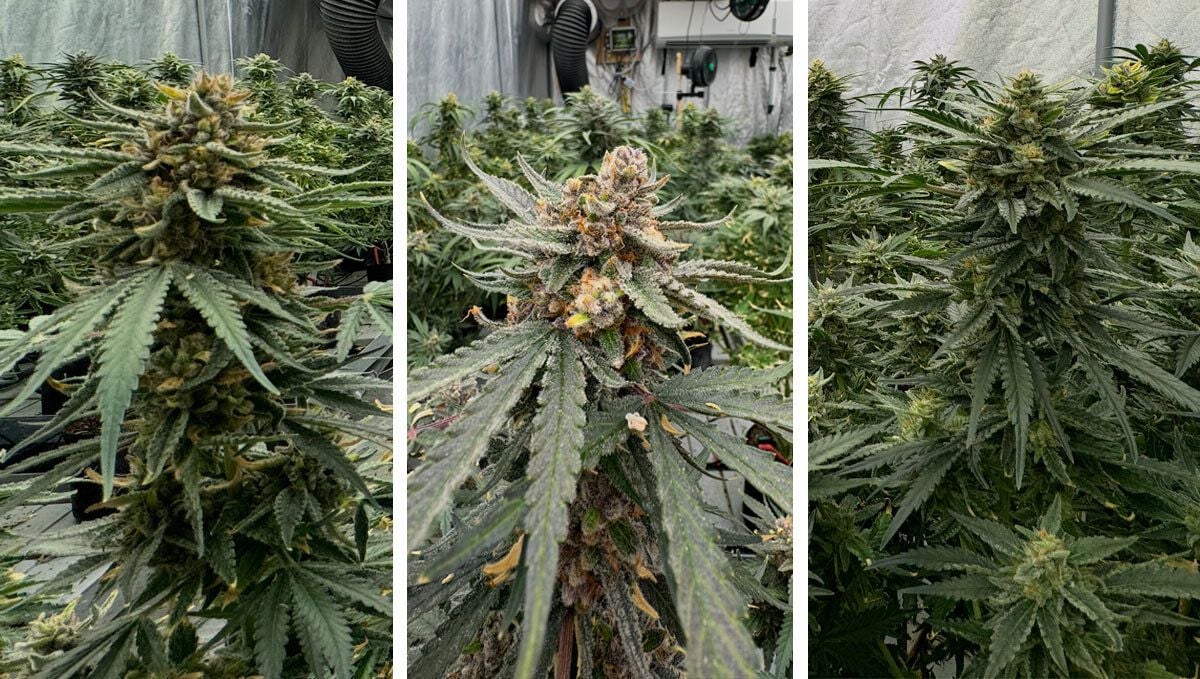
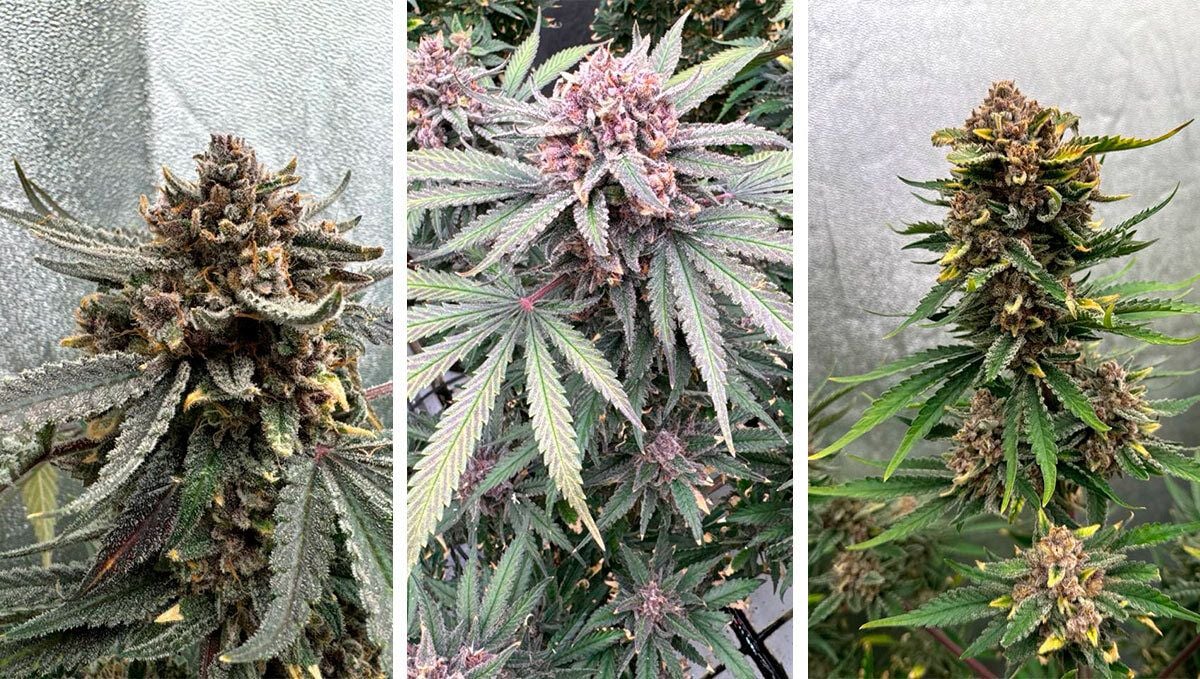
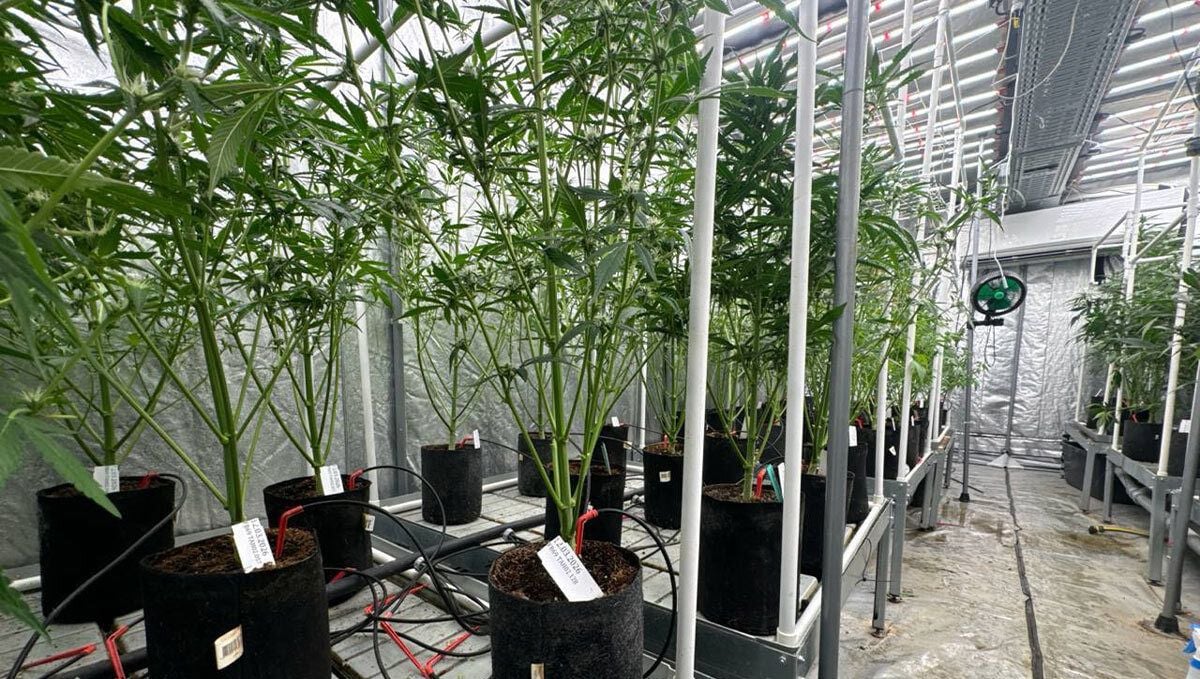
At this final stage, you can literally watch the plants change day by day and settle into their true expression. Colors begin to shift, with pink and purple hues bleeding into the canopy toward the end of the cycle, and the room fills with a sharp, sweet‑sour aroma that tells you the resin and terpenes are at their peak.
The tops are fully packed with seeds, sitting on beautifully structured plants that hold their shape all the way to the finish. This is the perfect timing to shoot final photos of each individual, capture their look at full maturity, and record the data for every tagged number before harvest.

From here, the main task is to patiently wait out the last stretch under controlled “autumn” conditions: temperatures are lowered and light intensity is gently reduced to guide the plants toward a clean finish. It is also crucial not to overwater at this point – the goal is to avoid stagnant moisture and any risk of root rot, since at this stage the plants are already drinking significantly less.

Cherry Cola RF3 : Two weeks before harvest

See you at the testing stage – that’s where these phenotypes will really have to prove themselves.

Final Moments Before the Cut


And here it is, the moment of harvest for Cherry Cola has finally arrived. After a long cycle of growth, selection, pollination, and seed development, the plants have reached their final stage.

Cherry Cola pre-harvest

In the video, you can see the condition of the plants just moments before harvest. The flowers are fully matured, the structure is complete, and the entire room carries the final expression of the cycle. What makes this moment special is how quickly everything changes. Less than half an hour after this footage was taken, the plants were already hanging in the drying room.

PreHarvest

30 min Before Harvest

Harvest always marks a strange transition. One phase ends immediately, while the next one begins just as fast. The energy of the room completely changes the moment the plants are cut down.

Finish of Cycle

The next step now is patience. We wait for the plants to dry properly before moving into the first stage of seed processing. Once drying is complete, the seeds will go through their initial cleaning and preparation phase before the next round of testing begins.

This is where the cycle closes and the future generation officially begins.

Mango Frost Auto: Tropical Terpenes Wrapped in Ice Cold Power

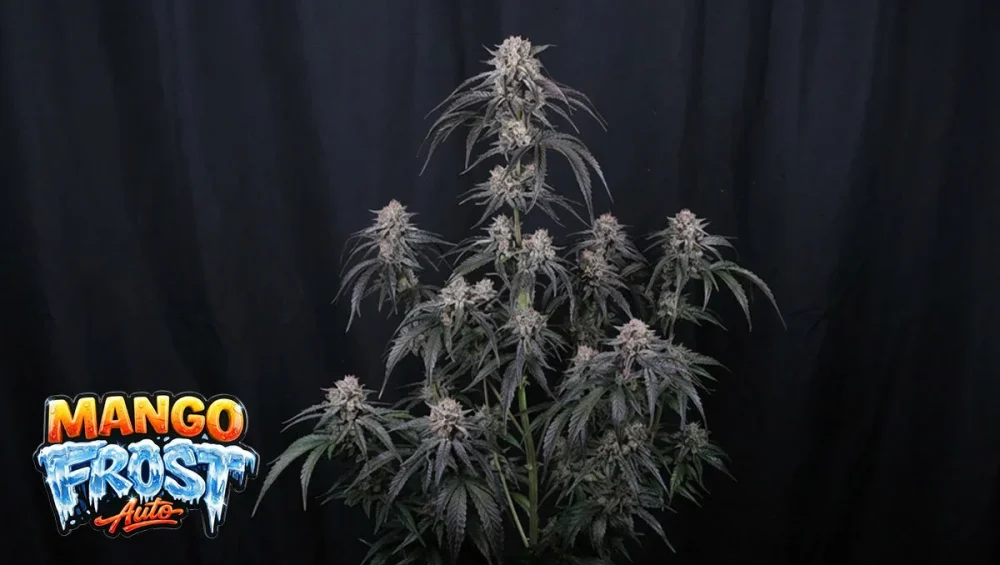
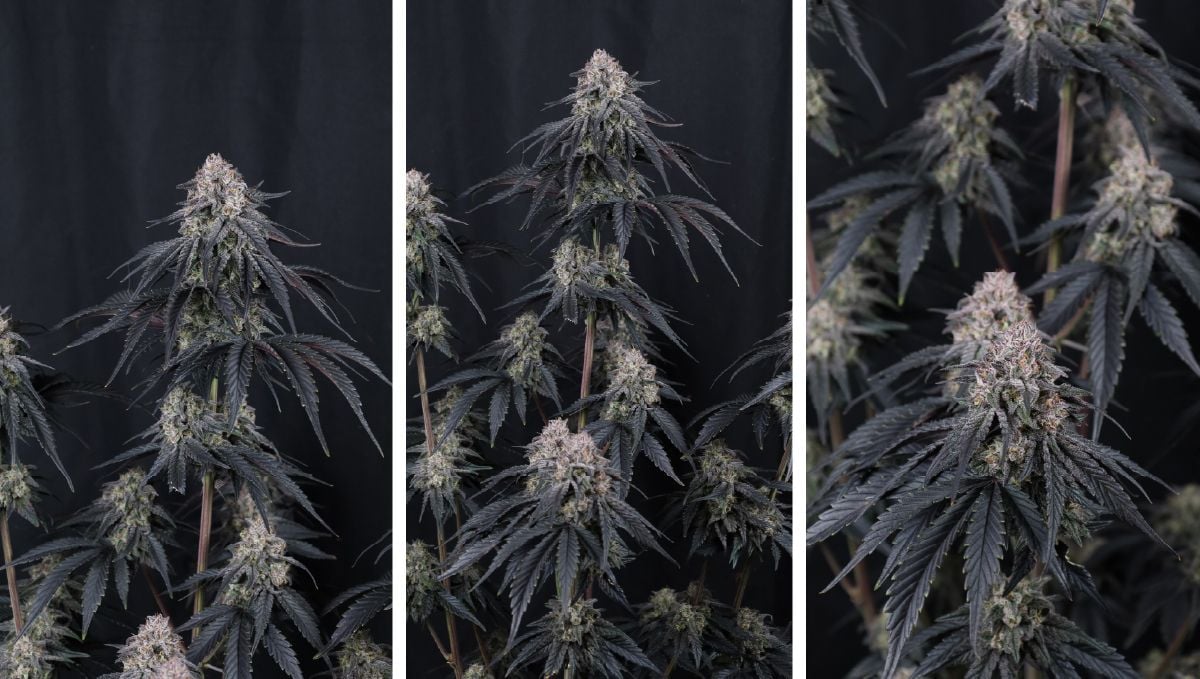
Mango Frost Auto is what happens when you stack winners on top of winners. Built from Mango Runtz F5 Auto by Mephisto Genetics and Frostbanger Auto, this cross brings together two Autoflower World Cup 2025 winners in one line.

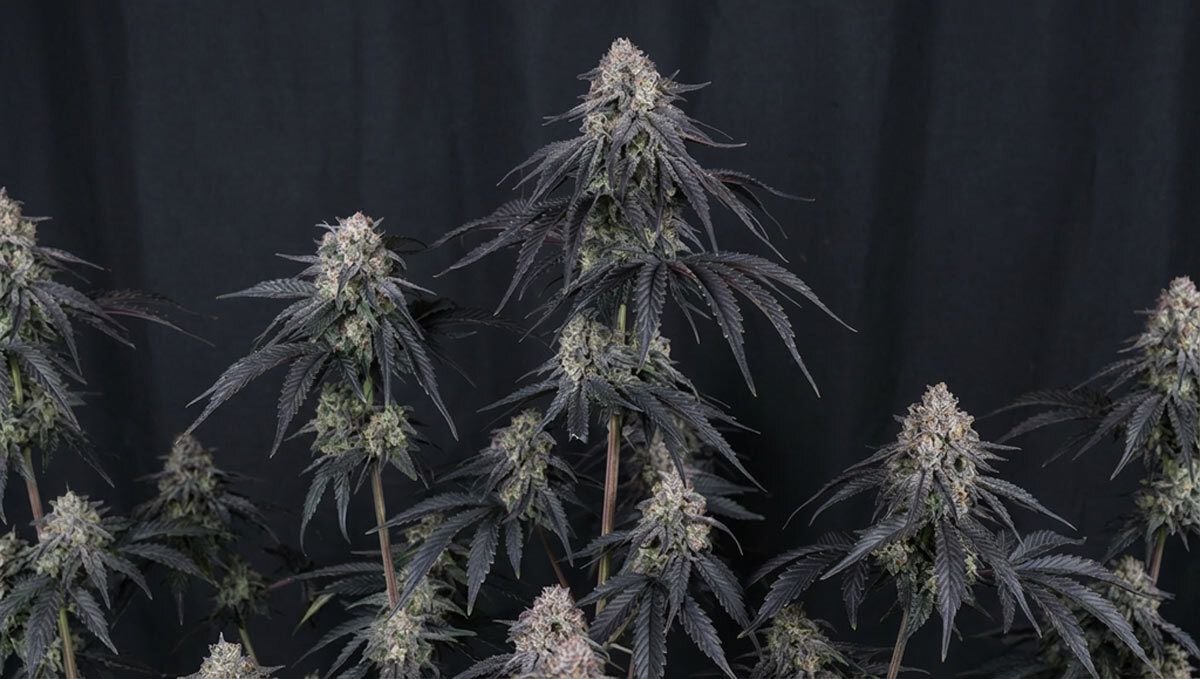
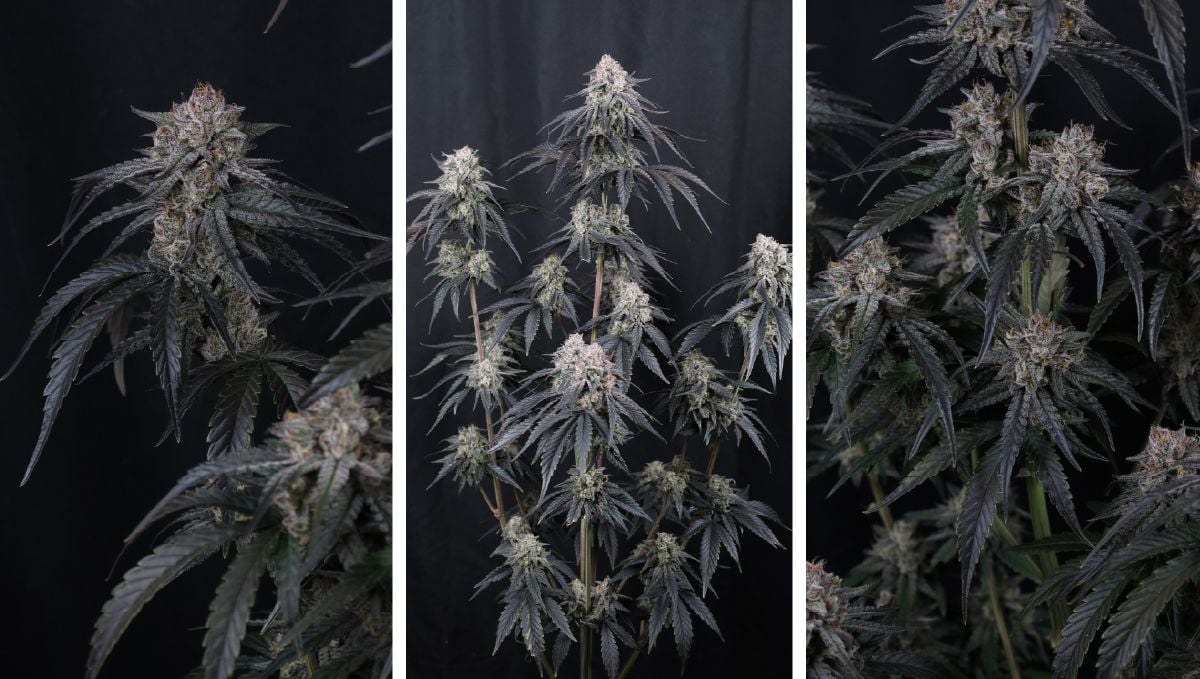
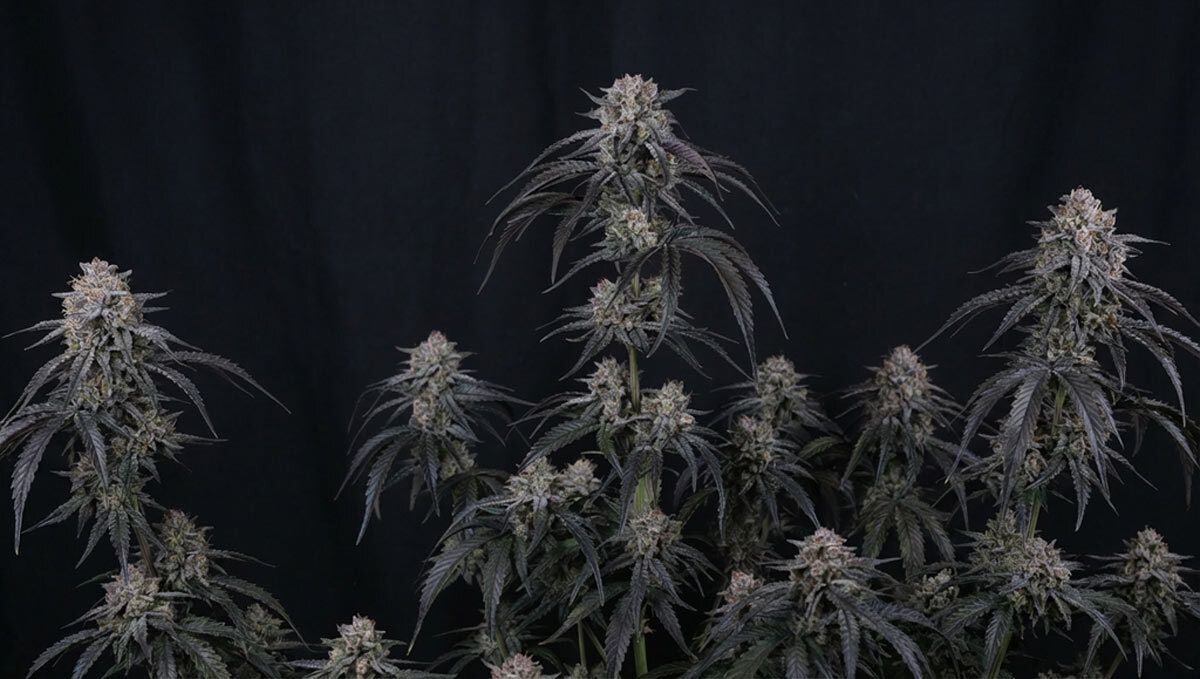
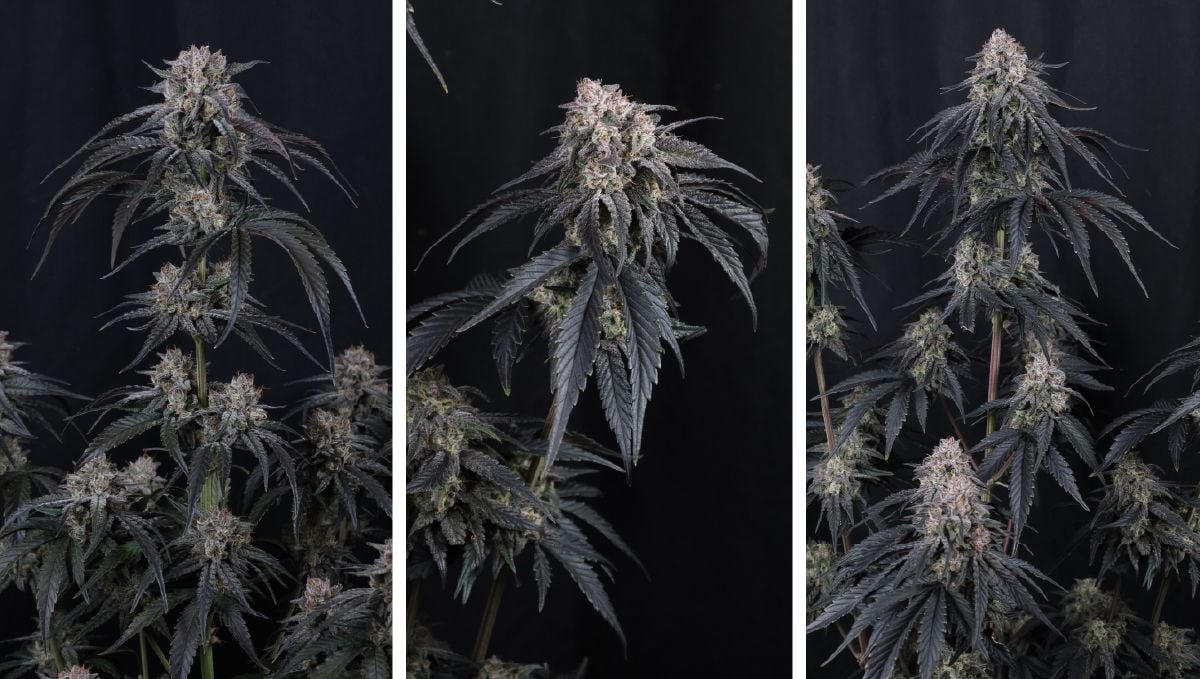
Mango Frost Auto

This strong pairing carries serious terpene quality alongside the kind of production that shows up clearly once the plants get going.

Mango Frost Auto

Resin, potency, and overall performance are present from early on and continue to build through the cycle.

Mango frost

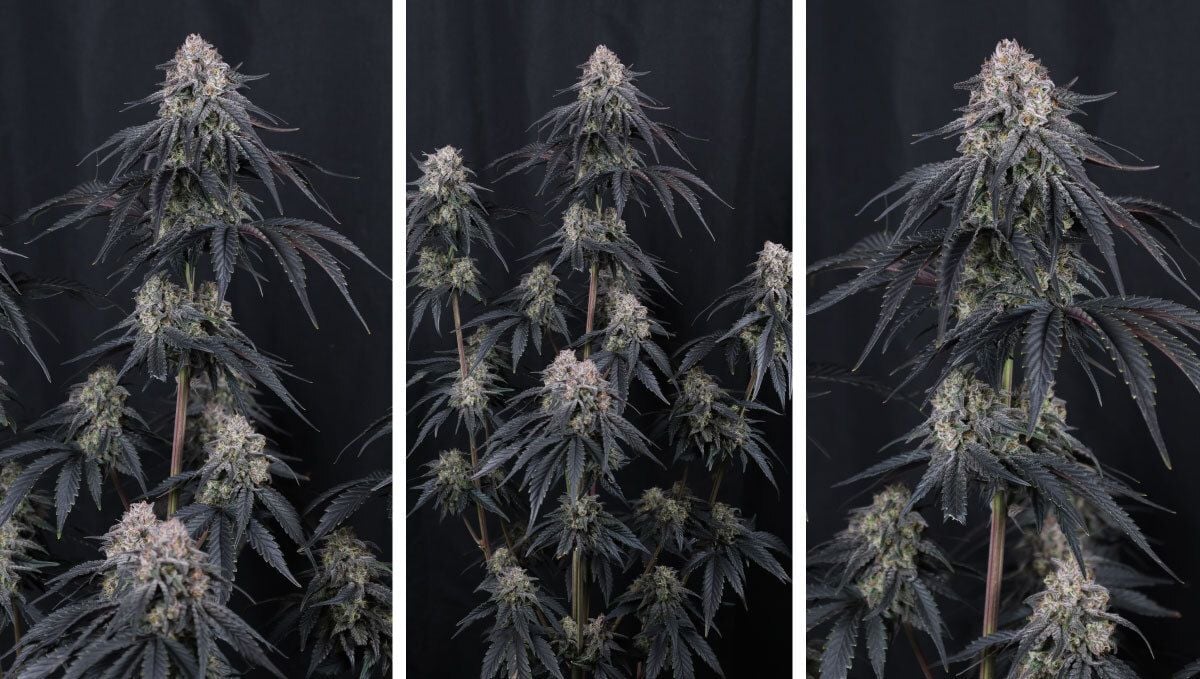
From early flower, the plant shows a clear direction. It stays compact and easy to manage, with a structure that fits well in a range of setups without needing much adjustment.

Built to Produce, Not to Stretch

Mango Frost

Bud development starts early and builds steadily. Flowers stack tightly across the plant and continue gaining weight as they mature. The structure stays consistent, allowing the plant to focus on forming dense, well-packed buds that carry through to the end of the cycle.

mango frost

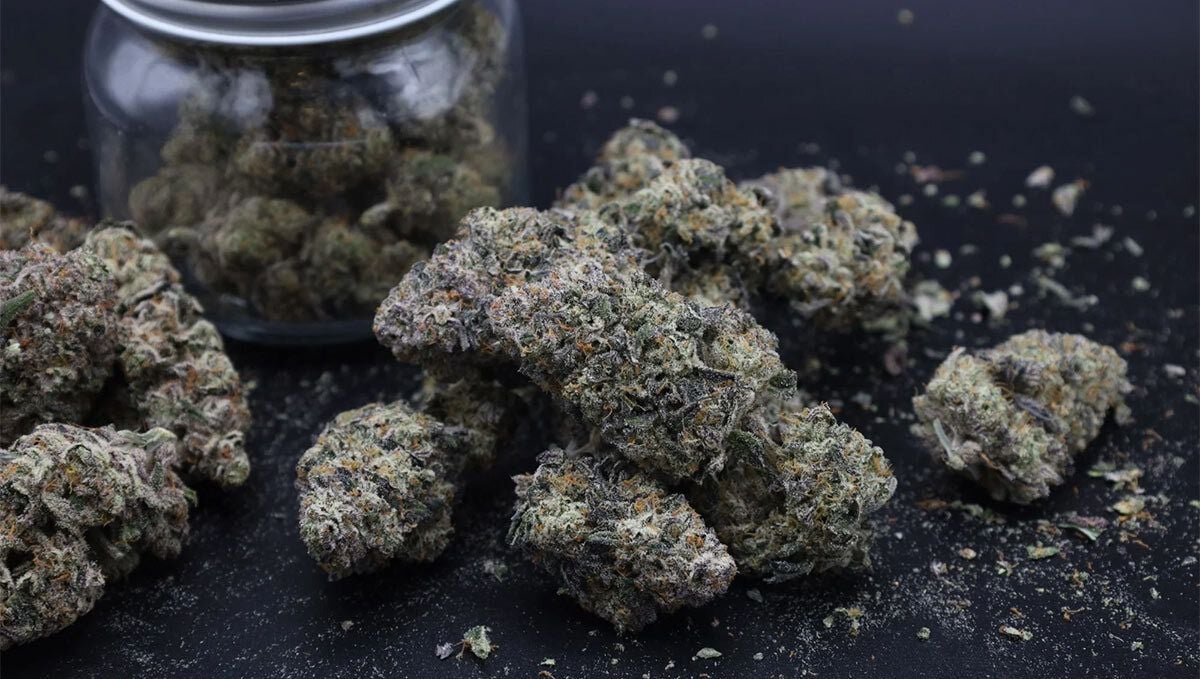
As flowering progresses, resin production becomes more noticeable. A thick, greasy layer develops across the buds, giving the plant a strong visual presence and making it well suited for both flower and extraction.

Loud Terpenes with Depth

mango frost

The terpene profile opens with sweet, juicy mango. As it develops, a creamy body comes through, followed by gassy notes and a light sour edge that adds depth. The aroma carries well and translates cleanly into the final smoke, keeping the profile full and expressive.

Power in Every Aspect

mango frost

Mango Frost Auto is aimed at growers looking for strong results across the board. It brings together solid effects, heavy resin production, and a terpene profile that stands out, all within a compact and manageable plant that performs consistently from run to run.

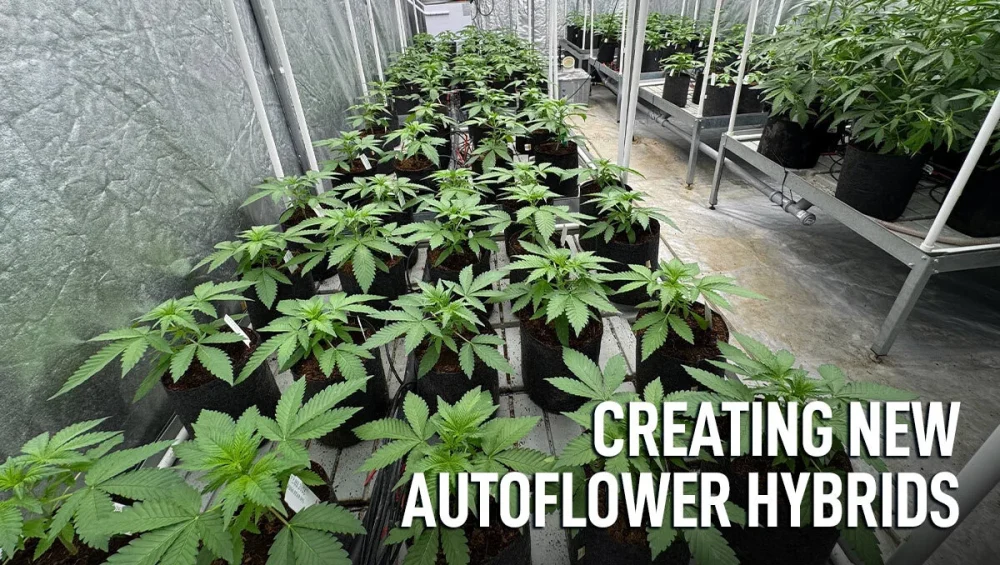
Creating new autoflowers hybrids

New F1 Hybrids: Cycle Start


Beginning of the Project


We have started the development of 11 new hybrid strains, and this will be a long-term project. Each of these crosses represents a new direction that requires careful work, observation, and strict selection.

At this stage, nothing is rushed. The goal is not just to create new combinations, but to fully understand how they behave, how stable they are, and whether they meet our standards over the entire cycle.

Males

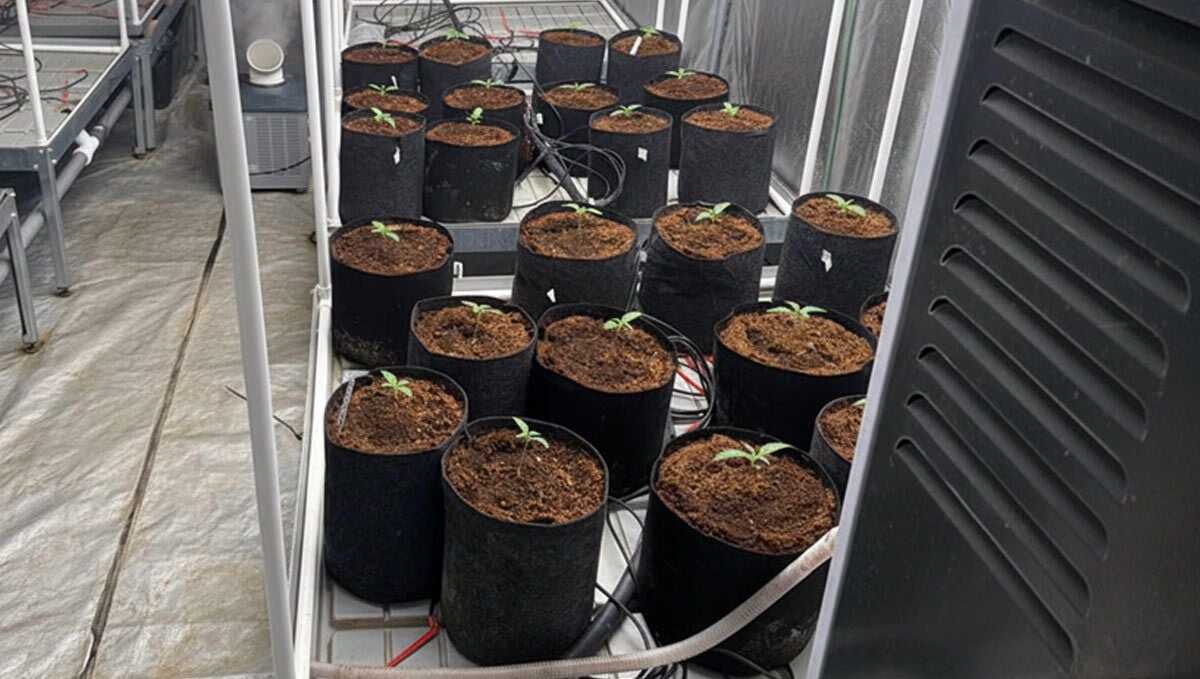
Males of new project

As always, we begin with the fathers. We plant more than needed at the start, knowing that in the end only one male will remain to cover the entire space. This approach allows us to compare multiple candidates and select the strongest, most stable, and most suitable individual for the job.

Introducing the Mothers


Next, we move into planting the mothers into coco. At this stage, the mothers are placed in the same environment as the fathers, where they begin their development together.

Introducing the Mothers

Introducing the Mothers

The plants are growing steadily, building structure, and adapting to the conditions. This phase is all about establishing balance between both sides of the cycle and ensuring proper synchronization for the stages ahead.

Early Growth and Structure


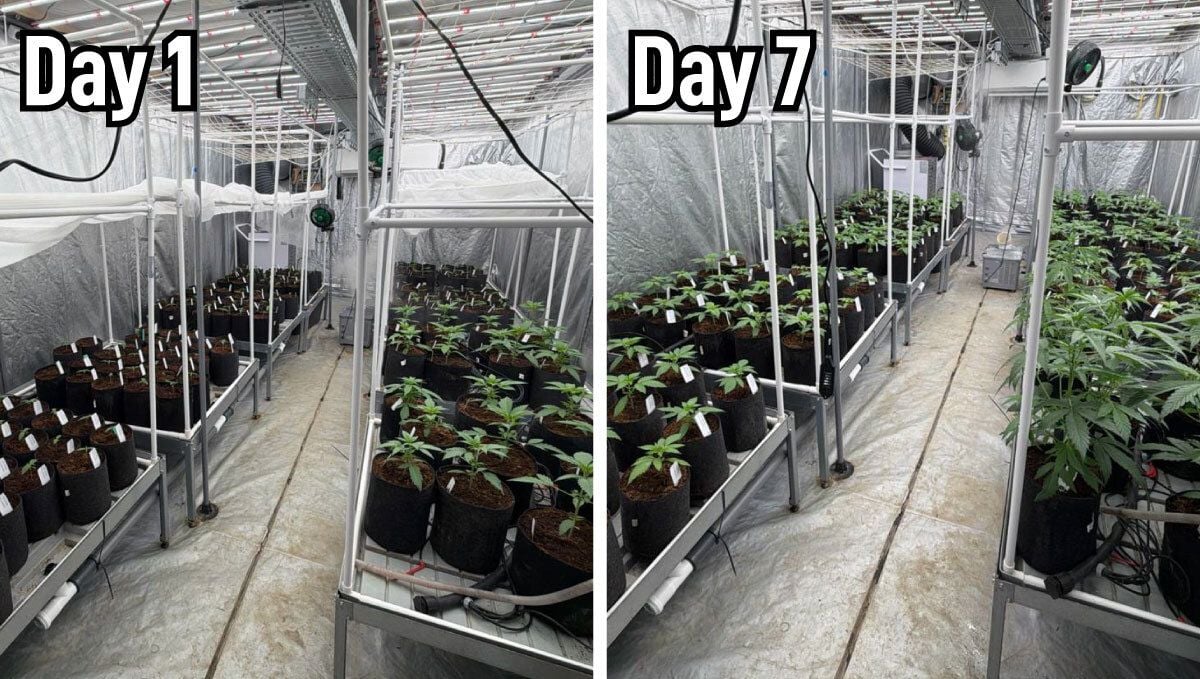
We take a close look at how the plants develop in the first few days after transplant, and then compare that to their condition one week later.

One Week Growth Difference

One Week Growth Difference

The differences are clearly visible. Plants are gaining structure, strengthening their stems, and showing consistent development across the population. Structural stability at this stage is a strong indicator that the cycle is progressing in the right direction.

Reversal Progress


While the plants are actively growing and moving toward pre-flower, the fathers have already undergone several STS applications and have successfully entered the reversal phase.

First Signs of Male Reversal

First Signs of Male Reversal

This ensures that by the time the mothers are ready, the male expression will be fully developed and capable of delivering pollen at the right moment. Timing here is critical, and everything is aligned to prepare for the next key phase.

Pre-Pollination Defoliation


Before pollination, we move into defoliation. This step is extremely important, as it directly affects the efficiency of the pollination process.

Pre-Pollination Defoliation

Pre-Pollination Defoliation

The main goal is to hit the timing correctly and ensure that all stigmas are accessible, especially the lower ones. Since we are working with only one selected father, it is essential to maximize pollen distribution across the entire population.

We remove the lower skirts and large fan leaves to open up the structure of the plants. This allows better airflow, improved light penetration, and most importantly, full exposure of all pollination sites.

Lollipopping

Lollipopping

This preparation stage sets the foundation for an effective and uniform pollination process in the next phase.

Select the fields to be shown. Others will be hidden. Drag and drop to rearrange the order.
  • Image
  • SKU
  • Rating
  • Price
  • Stock
  • Availability
  • Add to cart
  • Description
  • Content
  • Weight
  • Dimensions
  • Additional information
Click outside to hide the comparison bar
Compare
Shopping cart close